How Does a Resin Printer Work
A resin printer works by curing liquid photopolymer resin with UV light, solidifying it layer by layer to build detailed 3D objects. This process involves precise light projection and resin chemistry to achieve high-resolution prints. You’ll start with a digital model sliced into thin cross-sections.
The light source projects patterns onto the resin, hardening precise areas with each pass. Each cured layer bonds to the last as the build platform moves, creating smooth, intricate shapes. This layering technique allows for exceptional detail and accuracy in the final print.
There’s more to explore about different light types, resin properties, and post-processing techniques that shape the final print. Understanding these elements can help optimize print quality and durability. Mastery of resin printing opens up many creative and technical possibilities.
Key Takeaways
- Resin printers cure liquid photopolymer resin layer by layer using controlled light exposure to form solid objects.
- A build platform lowers into a resin vat, and light selectively hardens each layer according to the 3D model’s sliced pattern.
- Light sources include UV LEDs, LCD masks, lasers, or projectors that cure resin with high precision and detail.
- Each cured layer bonds to the previous one, building complex geometries from the bottom up with smooth surfaces.
- Post-processing includes cleaning, post-curing, and finishing to enhance strength, accuracy, and appearance of the print.
Overview of Resin Printing Technology
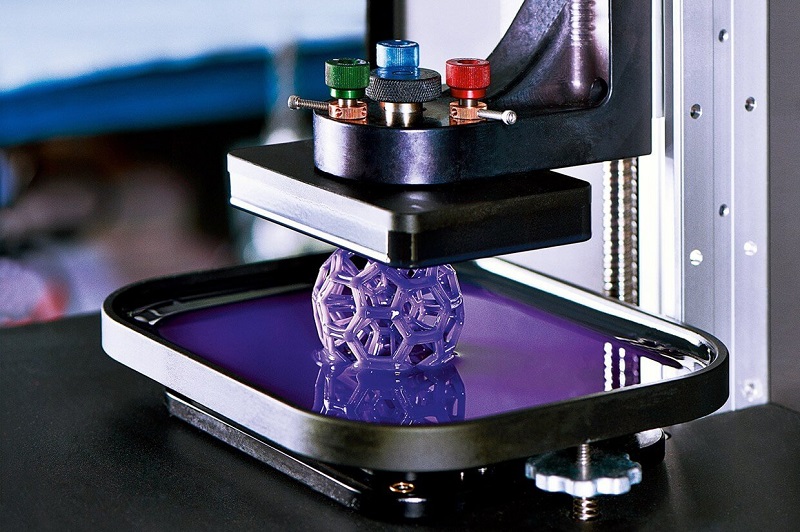
Although resin printing might seem complex at first, it’s actually a straightforward process that uses light to cure liquid resin into solid objects. You start with a vat filled with photosensitive liquid resin, which hardens when exposed to specific light wavelengths. A light source projects patterns layer by layer, solidifying resin precisely where needed.
Each cured layer bonds to the one below, gradually building your object from the bottom up. This method offers exceptional detail and smooth surfaces compared to traditional printing methods. You’ll find resin printing ideal for creating intricate models, prototypes, or parts requiring high resolution.
Understanding this light-driven curing process helps you appreciate why resin printers excel at producing finely detailed, durable prints with impressive accuracy.
Types of Resin Printers
When choosing a resin printer, you’ll often come across LCD and DLP technologies, each with its own strengths. You’ll also want to think about MSLA printers, which offer unique benefits in detail and speed.
Let’s explore how these types differ and what that means for your printing needs.
LCD vs. DLP Technology
If you’ve ever looked into resin printers, you’ve probably come across two main types of technology: LCD and DLP. Both use light to cure resin layer by layer, but they differ in how the image is projected. LCD printers use an array of LEDs shining through an LCD screen, which masks the image to cure the resin.
This method relies on the screen’s pixels, so resolution depends on the LCD panel. DLP printers, on the other hand, use a digital projector to flash each entire layer at once, often resulting in sharper details and faster curing times. While DLP can offer higher precision, LCD printers tend to be more affordable.
Understanding these differences helps you choose the best printer for your needs.
MSLA Printer Benefits
Because MSLA printers combine an LCD screen with an array of LEDs to cure resin, they offer a unique balance of speed, detail, and cost-effectiveness. You’ll find MSLA printers generally faster than traditional LCD printers since they expose an entire layer at once, rather than pixel by pixel. This means you can produce detailed models quicker without sacrificing precision.
Plus, MSLA printers tend to be more affordable than DLP alternatives, making them a great choice if you’re budget-conscious but still want high-quality prints. The LCD screen also allows for easy maintenance and replacement, extending your printer’s lifespan. If you want a reliable resin printer that balances speed, accuracy, and cost, MSLA technology is definitely worth considering.
The Role of Liquid Photopolymer Resin
When you use a resin printer, the liquid photopolymer resin is what forms your object layer by layer. This resin hardens through a precise curing process triggered by light exposure.
Understanding these properties helps you see how your prints take shape so accurately.
Properties of Photopolymer Resin
Although it might seem like just a simple liquid, photopolymer resin plays a crucial role in resin printing by determining the final quality and durability of your prints. Understanding its key properties helps you choose the right resin for your projects.
Here are four essential properties to keep in mind:
- Viscosity – Affects how smoothly the resin flows and fills intricate details.
- Reactivity – Determines how quickly the resin hardens when exposed to light.
- Mechanical Strength – Influences the toughness and flexibility of your finished print.
- Color and Transparency – Impacts the appearance and post-processing options.
Curing Process Mechanism
As you expose liquid photopolymer resin to specific light wavelengths, a chemical reaction triggers its transformation from a fluid into a solid. This process, called curing, involves the resin’s photoinitiators absorbing light energy, which activates polymerization. The resin molecules link together, forming long chains that harden layer by layer.
You control this precisely with the printer’s UV light source, which selectively cures only the areas needed for each layer of your 3D model. The uncured liquid resin remains fluid, allowing the next layers to form on top. This mechanism guarantees accuracy and detail in your prints, as each layer bonds seamlessly.
Understanding this curing process is key to optimizing print settings and achieving strong, high-quality resin prints every time.
Light Sources and Curing Process
Because the quality of your print depends heavily on how the resin cures, understanding the light sources involved is essential. Resin printers use specific light types to harden the liquid resin precisely where needed. Here’s what you should know:
- UV LEDs – Most common; emit light at a specific UV wavelength, activating the resin’s photoinitiators.
- LCD Screens – Block or allow UV light to pass through, curing resin in detailed patterns.
- Laser Sources – Use focused UV lasers to selectively cure resin with high precision.
- Projectors – Shine UV light through an LCD or DLP panel, projecting entire layers at once.
Each light source plays a vital role in the curing process, controlling resin hardening speed and print accuracy. Understanding them helps you optimize your printer’s performance.
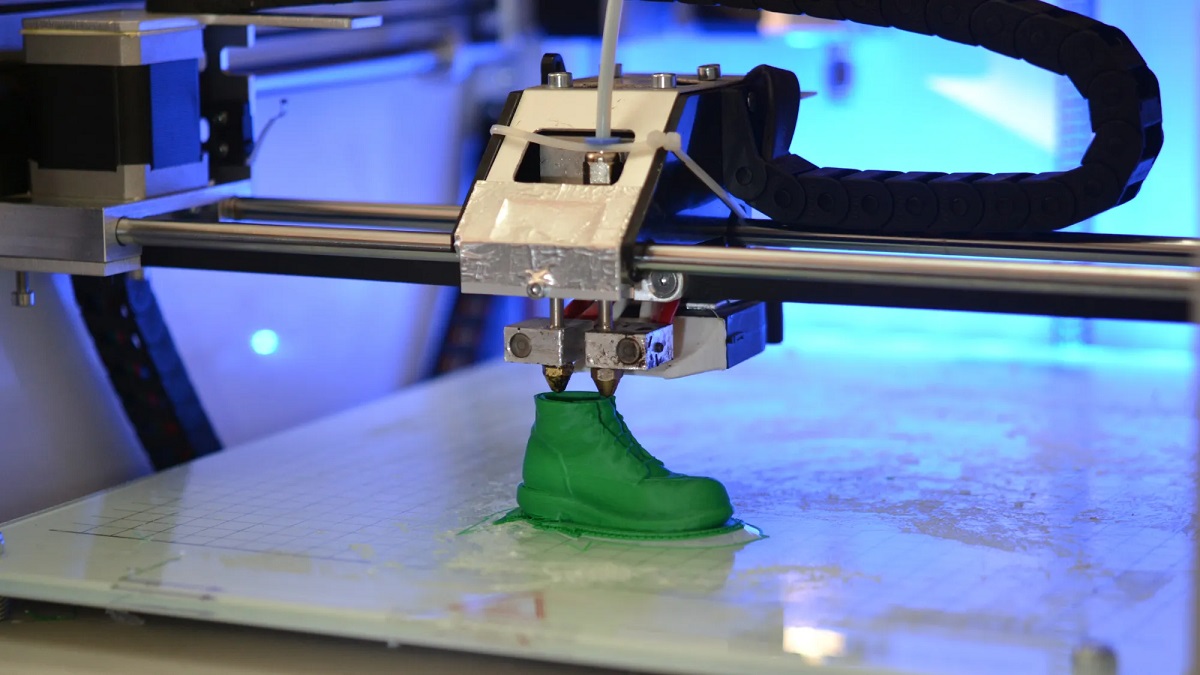
Layer-by-Layer Model Formation
When you start a resin print, the model is built one thin layer at a time, with each layer curing before the next begins. Your printer’s build platform lowers into the resin tank, and a light source cures the liquid resin precisely where the design specifies.
After a layer hardens, the platform lifts slightly to allow fresh resin to flow beneath. This process repeats as the model gradually forms from the bottom up. Each cured layer bonds securely to the previous one, ensuring strong adhesion and fine detail.
You’ll notice the printer’s careful coordination between platform movement and light exposure is vital for accuracy. This layer-by-layer formation lets you create complex geometries that traditional methods can’t easily achieve.
Post-Processing Steps for Resin Prints
Once your resin print finishes building layer by layer, it’s time to focus on post-processing steps that bring out the best in your model. These steps ensure your print is clean, durable, and visually appealing. Here’s what you need to do:
After printing, focus on post-processing to make your resin model clean, durable, and visually stunning.
- Remove the print carefully from the build platform using a scraper.
- Rinse the model in isopropyl alcohol (IPA) or a designated resin cleaner to wash off uncured resin.
- Cure the print under UV light or sunlight to fully harden the resin and strengthen the model.
- Trim supports and sand any rough edges for a smooth finish.
Following these steps will enhance your print’s quality and longevity, making sure your resin creation looks exactly how you envisioned it.
Advantages and Limitations of Resin Printing
Although resin printing offers incredible detail and smooth surfaces, it’s important to weigh both its advantages and limitations to see if it fits your project needs. You’ll appreciate the high resolution and fine features resin printers deliver, making them perfect for miniatures, jewelry, and dental models. The prints usually have a smoother finish, reducing the need for extensive post-processing.
However, resin printing has some drawbacks. The materials can be expensive and messy, requiring careful handling and ventilation. Prints may be brittle compared to filament-based ones, limiting their durability for functional parts.
Also, print sizes tend to be smaller, and the process can be slower. Understanding these factors helps you decide if resin printing aligns with your specific goals and workflow.
Frequently Asked Questions
How Do Resin Printers Compare in Noise Levels to Filament Printers?
You’ll find resin printers are generally quieter than filament printers since they use UV light instead of noisy motors and fans.
What Safety Precautions Are Needed When Handling Resin?
You’ll want gloves and goggles since resin’s toxic and can irritate skin or eyes—coincidentally, just like creativity’s risks, careful handling protects both your prints and yourself from harm,
ensuring safe and successful printing sessions.
Can Resin Prints Be Painted or Finished Like Traditional Models?
Yes, you can paint and finish resin prints just like traditional models. Just make sure to clean and cure them properly first.
Use primers and acrylic paints for best results, and you’ll achieve a smooth, detailed finish.
How Long Do Resin Printer Components Typically Last Before Replacement?
You’ll typically get 1-2 years from your resin printer’s components like the LCD screen or resin vat, depending on usage and maintenance.
Regular cleaning and careful handling can extend their lifespan before you need replacements.
Are There Eco-Friendly or Biodegradable Resin Options Available?
Just like Earth’s ancient alchemists sought gold, you’ll find eco-friendly resins made from plant-based or biodegradable materials today. These options reduce environmental impact while still delivering quality prints, letting you craft responsibly without sacrificing performance.
Many manufacturers now offer resins that break down more easily in the environment, helping reduce long-term waste. This innovation allows artists and makers to choose greener materials without compromising on strength or detail.
Conclusion
Now that you know how resin printers work, it’s clear they offer incredible detail and smooth finishes. Did you know resin printing can achieve layer resolutions as fine as 25 microns, which is about one-third the thickness of a human hair? This precision makes it perfect for intricate models.
While it takes some post-processing, the results are worth it. Resin printing technology allows for high-quality, detailed prints that are difficult to achieve with other methods. So, if you want exceptional accuracy and smooth surfaces, resin printing might be just what you need for your 3D printing projects.