How to Make an Envelope Out of Printer Paper
To make an envelope out of printer paper, start by cutting your paper to the desired size.
Fold the bottom edge up about two-thirds for the pocket, then fold the sides in toward the center so they overlap slightly. This simple process transforms plain printer paper into a functional envelope.
Next, fold the top flap down to close the envelope and secure all flaps with glue or tape. You can decorate it before or after folding to personalize your envelope.
With a few simple steps, you’ll have a neat, custom envelope ready to use.
Keep going if you want to learn helpful tips for sealing and mailing it properly. These additional pointers will ensure your envelope stays secure during transit.
Enjoy crafting your own envelopes with ease!
Key Takeaways
- Cut an 8.5 x 11-inch sheet into a square by trimming one corner diagonally.
- Fold the bottom corner up about two-thirds to form the envelope pocket.
- Fold the left and right corners inward to overlap at the center.
- Fold the top corner down to create the envelope flap.
- Secure side and bottom flaps with glue or tape, then seal the top flap when ready.
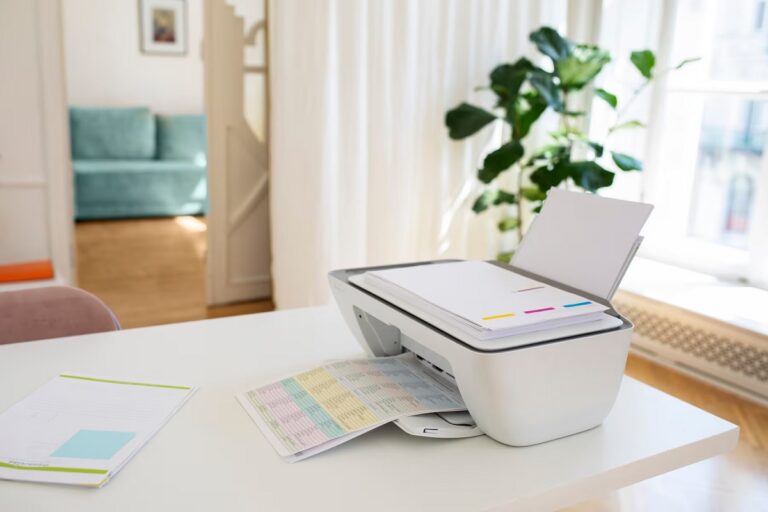
Materials Needed for Your Envelope

Before you begin folding, you’ll need a few simple materials to make your envelope. First, grab a standard sheet of printer paper—8.5 by 11 inches works perfectly. You won’t need anything fancy; plain white or colored paper is fine depending on your style.
Next, have a pair of scissors handy for trimming any edges if necessary. You’ll also want some adhesive—either glue stick, double-sided tape, or even a glue dot will do to seal your envelope securely. A ruler can be useful for making precise folds, but it’s optional.
Lastly, keep a pencil nearby to mark fold lines lightly if you want extra accuracy. With these materials ready, you’re all set to create your own envelope from printer paper.
Preparing the Printer Paper
Before you start folding, make sure you pick the right type of printer paper for a sturdy envelope. Next, measure carefully to get the perfect size, then cut your paper precisely.
Taking these steps guarantees your envelope will look neat and hold up well.
Selecting Paper Type
How do you choose the best paper for making an envelope? Start by picking printer paper that’s sturdy enough to hold its shape but still easy to fold. Standard 20-24 lb paper works well—it’s not too thin, so your envelope won’t tear easily, and not too thick, so it folds neatly.
Avoid glossy or heavily coated paper since it can be slippery and harder to crease accurately. If you want a more durable envelope, consider slightly heavier paper like lightweight cardstock, but keep in mind it might be trickier to fold precisely.
Also, plain white or lightly colored paper is best for a clean, professional look, but feel free to use decorative or patterned paper if you want something more unique. Choosing the right paper makes your envelope both functional and attractive.
Measuring and Cutting
Once you’ve picked the right paper, the next step is to measure and cut it accurately to guarantee your envelope will fold perfectly. Lay your printer paper flat on a clean surface. Use a ruler to mark the dimensions of your envelope template lightly with a pencil.
Common sizes include 9×9 inches for a standard envelope, but adjust based on your needs. Make sure your lines are straight and precise. After marking, use sharp scissors or a craft knife to cut along the lines carefully.
Cutting clean edges helps your envelope look neat and fold easily. Take your time with this step—precision now will save frustration later when folding and sealing your envelope.
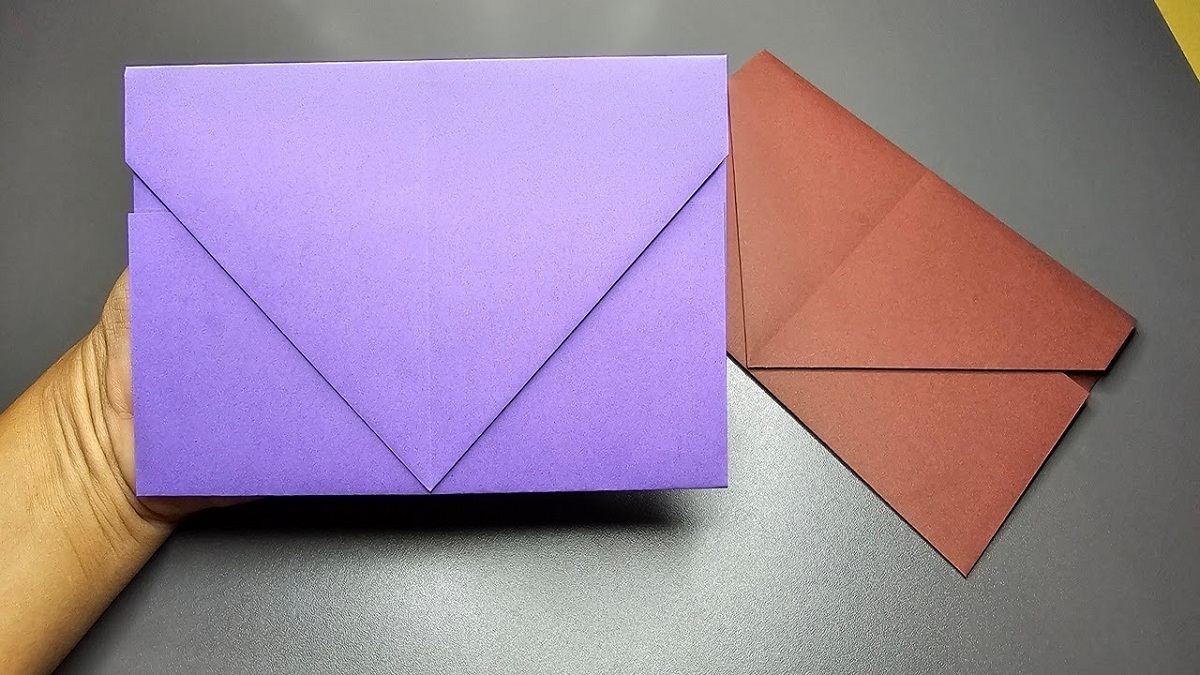
Folding the Paper Into an Envelope Shape
Although it might seem tricky at first, folding your printer paper into an envelope shape is straightforward once you follow a few simple steps. Start by laying your cut paper flat with the side you want visible facing down. Fold the bottom edge up about two-thirds of the way, creating the main pocket.
Next, fold the left and right edges toward the center, overlapping slightly to form the sides of the envelope. Make sure these folds are crisp by pressing firmly along the edges. Finally, fold the top flap down over the sides, aligning it neatly with the bottom fold.
Your paper now resembles an envelope shape, ready for the next step. Take your time to verify all edges are even and symmetrical for a polished look.
Securing the Envelope Flaps
To keep your envelope securely closed, you’ll need to pick the right adhesive that adheres well to printer paper. Folding the flaps properly ensures a neat seal and helps the glue hold better.
With a few simple tips, you can make sure your envelope stays durable and intact during mailing or storage.
Choosing the Right Adhesive
When you’re ready to seal your paper envelope, picking the right adhesive is key to keeping it secure without causing damage. You’ll want something strong enough to hold the flaps together but gentle enough to avoid tearing the paper. Glue sticks are a great choice because they’re easy to apply, dry quickly, and don’t create a mess.
Double-sided tape works well too, offering a clean finish and instant adhesion. Avoid using liquid glue that’s too wet; it can warp the paper and cause wrinkles. If you prefer something temporary, removable tape is an option, but it won’t hold as firmly.
Choose the adhesive based on how long you want your envelope sealed and the weight of the contents inside.
Proper Flap Folding Techniques
Securing your envelope flaps properly guarantees your contents stay safe during transit. To start, fold the side flaps inward so they overlap slightly in the center.
Next, fold the bottom flap up over the side flaps, making sure the edges align neatly. Finally, fold the top flap down to close the envelope. Press each fold sharply to create crisp edges; this helps the flaps stay in place and gives your envelope a professional look.
Avoid leaving gaps or uneven folds, as these can cause the envelope to open or damage the contents. If you’re planning to seal it later, ensure your folding creates a smooth surface for adhesive application. Proper folding is key to a secure, tidy envelope that protects what’s inside.
Tips for Durable Sealing
Although proper folding sets the foundation, you’ll need reliable sealing methods to keep your envelope firmly closed. Without a secure seal, your contents risk falling out or getting damaged. Here are some tips to help you seal your paper envelope effectively:
- Use a glue stick or double-sided tape for a clean, mess-free seal.
- Apply a thin layer of clear-drying craft glue along the flap edges.
- Consider a small piece of transparent tape for extra reinforcement.
- Press down firmly on the flap for at least 30 seconds to ensure adhesion.
- Let glue dry completely before handling to avoid unintentional openings.
Customizing Your Envelope Design
Since your envelope is made from plain printer paper, you have a blank canvas to personalize it however you like. You can use markers, colored pencils, or stamps to add designs and colors that reflect your style or the occasion.
If you want a more polished look, consider printing patterns or images directly onto the paper before folding. Adding stickers or washi tape along the edges can enhance the appearance without much effort. Don’t forget to label the envelope clearly with a sharp pen or printed address.
You might also experiment with different folding styles or shapes to make your envelope stand out. Customizing your envelope not only makes it unique but also adds a thoughtful touch to your correspondence.
Tips for Mailing Your Handmade Envelope
When you’re ready to mail your handmade envelope, it’s important to make certain it meets postal requirements so it reaches its destination without issues. Handmade envelopes can be charming, but they need to be sturdy and properly addressed. Here are some tips to help you:
- Use strong glue or double-sided tape to seal the envelope securely.
- Ensure the envelope is standard size or check with your postal service for non-standard dimensions.
- Write the recipient’s address clearly with a permanent pen.
- Include your return address in case the letter needs to be returned.
- Affix the correct postage based on the envelope’s weight and size.
Following these steps helps your handmade envelope look professional and arrive safely.
Frequently Asked Questions
Can I Use Colored Printer Paper for Envelopes?
Yes, you can definitely use colored printer paper for envelopes. It’ll add a personal, vibrant touch to your mail.
Just make sure the paper is sturdy enough to hold its shape and handle mailing without tearing.
How Do I Address an Envelope Without Smudging?
Like a careful calligrapher, you shouldn’t rush—use a fine-tip, quick-drying pen and let each word breathe.
Avoid smudging by writing slowly and blotting gently if needed;
patience turns your envelope into a masterpiece.
Is Printer Paper Durable Enough for Mailing?
Printer paper isn’t very durable for mailing; it can tear or get damaged easily. You’ll want to reinforce it with tape or use a sturdier envelope to protect your contents and guarantee it arrives safely.
Can I Add a Window to My Handmade Envelope?
Absolutely, you can add a window to your envelope; think of it as a little window in a cozy cabin, letting a glimpse inside.
Just cut a small rectangle, attach a clear plastic sheet, and seal carefully.
How Do I Recycle or Reuse Old Envelopes?
You can reuse old envelopes by carefully opening them to preserve the flap for resealing. Alternatively, recycle them with your paper waste. Just remove any plastic windows or stickers before tossing them in the bin.
Conclusion
Now that you’ve turned a simple sheet of printer paper into a neat envelope, you’ve transformed ordinary into extraordinary. It’s funny how something so basic can hold something so important. Your handmade envelope isn’t just paper folded—it’s a little package of creativity and care.
Whether it’s for a quick note or a special letter, you’ve crafted something unique that stands out among store-bought ones. Who knew a few folds could make such a difference? Making an envelope out of printer paper is a simple, creative way to add a personal touch to your correspondence.
This easy DIY project shows how practical and fun it can be to create your own envelope. Embrace the charm of handmade envelopes and enjoy the satisfaction of turning printer paper into something special.