How to Connect Epson Printer to Wifi
To connect your Epson printer to WiFi, first confirm it supports wireless networking and know your WiFi name and password. Connecting an Epson printer to WiFi allows for convenient wireless printing from various devices.
Power on the printer, reset its network settings, then navigate its control panel to find the WiFi Setup Wizard.
Select your network, enter the password, and confirm. You can also use Epson’s software for setup.
After connecting, print a test page to verify it’s working.
For tips on troubleshooting and enhancing connection reliability, keep exploring these steps. Following these instructions will help you maintain a stable and efficient wireless connection with your Epson printer.
Key Takeaways
- Verify your Epson printer supports Wi-Fi by checking the control panel or user manual for Wi-Fi capability.
- Use the printer’s control panel WiFi Setup Wizard to select your network and enter the WiFi password.
- Ensure your network is 2.4 GHz and disable VPNs or firewalls temporarily during setup to avoid connection blocks.
- Restart your printer and router if the connection fails, and confirm the device used for setup is on the same network.
- Update your printer’s firmware regularly via Epson’s support site for improved connectivity and performance.
Check Your Epson Printer’s Wireless Compatibility
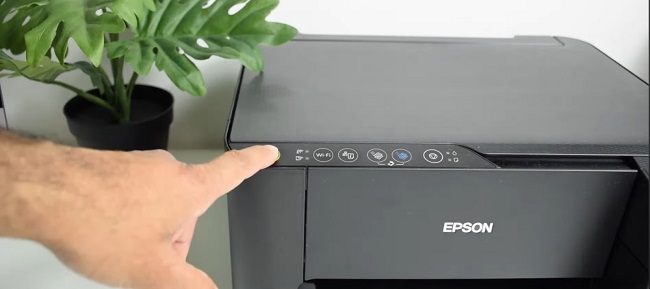
Before you try connecting your Epson printer to Wi-Fi, make sure it actually supports wireless functionality. Not all Epson models have built-in Wi-Fi, so checking is vital to avoid frustration. Look for a Wi-Fi symbol on the printer’s control panel or refer to the user manual.
You can also find this information on Epson’s official website by searching your printer’s model number. If your printer doesn’t support Wi-Fi, you won’t be able to connect it wirelessly without additional hardware like a wireless print server. Confirming wireless compatibility ensures you’re on the right track before moving forward.
Once you know your printer supports Wi-Fi, you can proceed confidently to set up the connection without wasting time on incompatible devices.
Prepare Your WiFi Network Information
Before connecting your Epson printer, make sure you know your WiFi network name (SSID) exactly as it appears. Double-check your password to avoid any connection issues during setup.
Having this information ready will make the process smoother and quicker.
Network Name Identification
Although setting up your Epson printer seems straightforward, you’ll need to know your WiFi network name (SSID) to connect it properly. The SSID is what identifies your network among others nearby. You can usually find it on a sticker on your router or by checking your device’s WiFi settings.
Make sure you select the correct SSID during setup to avoid connection issues.
Here’s a quick way to identify your network:
| Step | Action |
|---|---|
| 1 | Locate your router |
| 2 | Find the SSID sticker on router |
| 3 | Check WiFi settings on your phone |
| 4 | Note down the exact SSID spelling |
| 5 | Confirm no extra spaces or symbols |
Knowing your SSID guarantees a smooth printer connection process.
Password Verification Process
Once you’ve identified your network name, the next step is to verify your WiFi password. Make sure you have the exact password handy, as it’s case-sensitive and must be entered correctly for a successful connection. If you’re unsure of the password, check your router’s label or access your router’s settings via a connected device.
You can also ask someone who manages your network. Avoid guessing, as multiple failed attempts can temporarily lock you out from connecting. Having the correct password ready will save time and prevent frustration during setup.
Power On and Reset Your Epson Printer’s Network Settings
First, make sure your Epson printer is powered on. Then, access the network settings menu on the printer’s control panel.
From there, you can reset the WiFi configuration to start fresh with your connection.
Powering On Steps
Before connecting your Epson printer to WiFi, you’ll need to power it on and reset its network settings to guarantee a fresh start. First, locate the power button on your printer, usually found on the control panel or side. Press it once to turn the device on, and wait for the printer to complete its startup process.
Next, to reset the network settings, access the printer’s menu using the control panel buttons. Navigate to the network or setup section, then find the option to restore network defaults or reset network settings. Confirm the reset, which clears any previous WiFi info, allowing you to connect to a new network without conflicts.
Now your printer is ready for the next setup steps.
Accessing Network Settings
With your Epson printer powered on and network settings reset, you’re ready to access the network menu to begin connecting to WiFi. Use the control panel or touchscreen to navigate easily. Locate the setup or network icon to enter the connection settings.
Here’s a quick guide:
| Step Number | Action |
|---|---|
| 1 | Press the Home or Setup button |
| 2 | Select Network or WiFi Setup |
| 3 | Choose Wireless LAN Setup |
| 4 | Select WiFi Setup Wizard |
| 5 | Follow on-screen instructions |
Resetting WiFi Configuration
Although resetting your Epson printer’s WiFi configuration might seem intimidating, it’s a straightforward process that guarantees a fresh start for your network connection. First, make sure your printer is powered on. Then, locate the setup or network button on your printer’s control panel.
Press and hold this button for about 5 to 10 seconds until the WiFi light starts blinking or the screen prompts a reset confirmation. This clears any previous network settings, allowing you to reconnect to a new or existing WiFi network. After the reset, access the network settings menu again to select your WiFi network and enter the password.
Resetting helps resolve connection issues and ensures your printer can communicate properly with your devices.
Connect Epson Printer Using the Control Panel
When you want to connect your Epson printer to WiFi, using the control panel is a straightforward method that lets you manage settings directly on the device. Start by pressing the Home button, then navigate to the WiFi Setup menu. Select “WiFi Setup Wizard,” and your printer will search for available networks.
Choose your network, enter the password carefully, and confirm the connection. Once connected, your printer will display a confirmation message.
| Step | Action | Feeling |
|---|---|---|
| 1 | Access WiFi Setup Wizard | Confident |
| 2 | Select Your Network | Hopeful |
| 3 | Enter Password & Confirm | Accomplished |
Using the control panel keeps you in control and guarantees a quick, secure connection.
Use Epson Software to Connect Printer to WiFi
If you prefer a guided setup, using Epson’s software makes connecting your printer to WiFi simple and efficient. First, download and install the Epson Connect Printer Setup Utility from Epson’s official website. Once installed, open the software and select your printer model from the list.
The program will then guide you through selecting your wireless network and entering the WiFi password. Make sure your printer is powered on and nearby during this process. The software handles the communication between your computer and printer to establish the connection securely.
After completing the steps, the utility will confirm when your printer is successfully connected to the WiFi network. This method is especially helpful if your printer’s control panel is limited or you want a straightforward way to set up wireless printing.
Verify Printer Connection and Print a Test Page
Once your Epson printer is connected to WiFi, you’ll want to verify the connection and print a test page to make certain everything’s working properly. This step confirms your printer is communicating with your network and ready for use.
To verify and print a test page:
- Access the printer’s control panel or Epson software on your computer.
- Navigate to the “Network Settings” or “Print Test Page” option.
- Select “Print Test Page” to produce a sample printout.
- Check the test page for clarity and completeness.
If the test page prints correctly, your printer is successfully connected. If not, double-check your WiFi settings before proceeding. This ensures smooth operation for all your future printing tasks.
Troubleshoot Common WiFi Connection Issues
Although connecting your Epson printer to WiFi is usually straightforward, you might encounter some common issues that prevent a stable connection. First, check that your printer and router are within range and there’s no interference from other devices. Make sure your WiFi password is entered correctly on the printer.
If the printer doesn’t show up on your network, restart both the printer and router to refresh connections. Also, confirm your network is set to 2.4 GHz since many Epson printers don’t support 5 GHz bands. If your printer keeps disconnecting, disable any VPN or firewall temporarily, as they might block communication.
Finally, verify your device’s WiFi is active and connected to the same network as your printer for seamless printing.
Update Your Epson Printer’s Firmware for Better Connectivity
When you’ve tried troubleshooting your WiFi connection and still face issues, updating your Epson printer’s firmware can often help improve its performance and connectivity. Firmware updates fix bugs, enhance compatibility, and sometimes add new features that make your printer work better with your network.
Here’s how to update your Epson printer’s firmware:
- Visit Epson’s official support website and enter your printer model.
- Download the latest firmware update available for your device.
- Connect your printer to your computer via USB or ensure it’s on the same WiFi network.
- Run the firmware update tool and follow the on-screen instructions carefully.
Keeping your firmware up to date ensures smoother wireless connections and fewer interruptions.
Frequently Asked Questions
Can I Connect My Epson Printer to Multiple Wifi Networks Simultaneously?
No, you can’t connect your Epson printer to multiple Wi-Fi networks at the same time.
You’ll need to switch between networks manually if you want to use different connections, as it only supports one active Wi-Fi network.
How Do I Connect an Epson Printer to a Hidden Wifi Network?
You’ll need to manually enter your hidden network’s SSID and password on your Epson printer’s control panel. Access the wireless setup, choose “Hidden Network,” then input the network name and security details to connect.
Is It Possible to Connect My Epson Printer via Bluetooth Instead of Wifi?
Yes, you can connect some Epson printers via Bluetooth, but not all models support it. Check your printer’s specifications to confirm. Bluetooth is usually for mobile printing, so WiFi remains the most common connection method.
Can I Use a Mobile Hotspot to Connect My Epson Printer?
Sure, you can connect your Epson printer using a mobile hotspot. Just make certain your hotspot’s signal is steady and strong, then link your printer’s WiFi settings to the hotspot for seamless, speedy printing anywhere you go.
How Do I Connect My Epson Printer to Wifi Without a Control Panel?
You can connect your Epson printer without a control panel by using the Epson Connect Printer Setup Utility on your computer.
Just run the software, follow the prompts to select your Wi-Fi network, and enter the password.
Conclusion
Connecting your Epson printer to WiFi might seem tricky at first, but it’s actually straightforward once you follow the steps. Even if you worry about complicated settings, using the control panel or Epson’s software makes it simple. Picture your printer seamlessly communicating with your network, ready to print anytime.
Just double-check your network info, reset if needed, and update the firmware to keep things running smoothly. You’ll be printing wirelessly in no time!
By following these steps to connect your Epson printer to WiFi, you ensure a hassle-free setup and reliable wireless printing experience.