How Does a 3d Printer Work
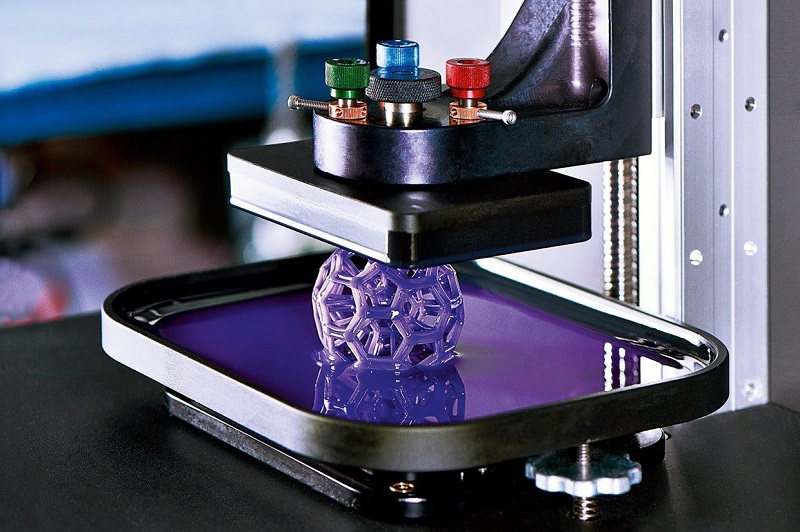
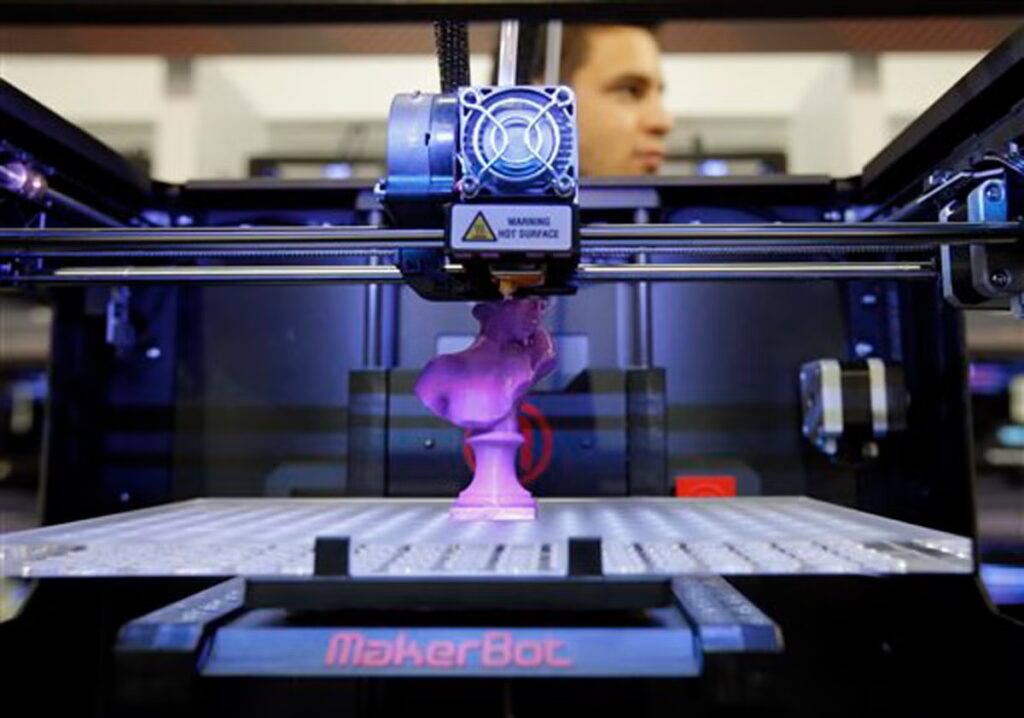
A 3D printer works by turning your digital design into a physical object through additive manufacturing. This innovative technology builds the object layer by layer, starting from the bottom, using materials like plastic, resin, or metal.
With a 3D printer, you can create complex shapes that are impossible with traditional manufacturing methods.
You begin with a 3D model and slice it into thin layers. Then, the printer deposits material precisely one layer at a time. This precise layering process brings your digital design to life.
Different 3D printing technologies and materials play a crucial role in the final product. Each method offers unique advantages depending on the application. Keep exploring to discover how these variations impact your 3D printing projects.
Key Takeaways
- A 3D printer builds objects layer by layer from a digital 3D model using additive manufacturing processes.
- The process begins by slicing the 3D model into thin horizontal layers to guide material deposition.
- Printers deposit materials like plastic filament, resin, or metal sequentially, fusing each layer to form the object.
- Different technologies such as FDM, SLA, and SLS use melting, curing, or sintering methods to create layers.
- Post-printing steps include removing supports, smoothing, and curing to finalize the printed object’s quality and strength.
The Basics of 3D Printing Technology
Although 3D printing might seem complex, its basic concept is straightforward: you create a physical object by layering material based on a digital design. You start with a 3D model, usually created in software or scanned from an existing item. This model is sliced into thin horizontal layers, which guide the printer on where to deposit material.
The printer then adds material layer by layer, such as plastic, resin, or metal, gradually building your object from the bottom up. Each layer fuses with the previous one, shaping the final product accurately. This additive process contrasts with traditional methods that remove material.
Once finished, you might need to clean or cure the print, but the core idea remains simple—turning digital plans into tangible objects through precise layering.
Types of 3D Printing Methods
You’ll find several common 3D printing technologies, each working in unique ways to build objects layer by layer. These methods also use different materials, from plastics to metals, expanding what you can create.
Understanding these variations helps you choose the right approach for your project.
Common Printing Technologies
How do 3D printers create such a variety of objects with different materials and details? It all comes down to the printing technology they use. The most common methods include Fused Deposition Modeling (FDM), where melted plastic filament is layered precisely to build your design.
Then there’s Stereolithography (SLA), which uses a laser to harden liquid resin layer by layer, giving you incredibly fine details. Selective Laser Sintering (SLS) is another popular option; it fuses powdered material with a laser, perfect for complex geometries without support structures. Each technology has its strengths depending on the object’s purpose and required detail.
Understanding these will help you choose the right printer or service for your project, ensuring your creation comes out just as you imagined.
Material Variations Explored
Since different 3D printing methods rely on various materials, understanding these material variations is key to getting the results you want. For example, Fused Deposition Modeling (FDM) uses thermoplastic filaments like PLA and ABS, which melt and solidify quickly, perfect for durable prototypes.
Stereolithography (SLA) works with liquid resin cured by UV light, offering high detail and smooth finishes. Selective Laser Sintering (SLS) employs powdered materials such as nylon, providing strong, functional parts without support structures. Each material has unique properties—flexibility, strength, or finish—that influence your print’s performance.
Knowing what your project demands helps you pick the right combination of method and material, ensuring efficiency and quality in your 3D printing endeavors.
Materials Used in 3D Printing
What materials can you use to bring your 3D designs to life? It depends on the printer and project, but here are four common types:
- PLA (Polylactic Acid): A biodegradable plastic, perfect for beginners due to its ease of use and low warping.
- ABS (Acrylonitrile Butadiene Styrene): Strong and heat-resistant, ideal for durable parts but requires a heated bed.
- Resin: Used in SLA printers, it produces high-detail, smooth finishes but needs post-curing.
- Nylon: Flexible and tough, great for functional parts that need to withstand stress.
Each material offers unique properties, so choosing the right one depends on your design’s purpose, required strength, and finish.
Understanding these helps you create effective and lasting 3D prints.
The Role of 3D Modeling Software
Choosing the right material is just one part of the process; you also need a detailed design to guide your printer. That’s where 3D modeling software comes in. This software lets you create a digital blueprint of the object you want to print.
You can design from scratch or modify existing models, adjusting dimensions and shapes with precision. The software translates your design into a format the printer understands, typically an STL or OBJ file. It also allows you to check for errors and optimize the model to guarantee a successful print.
Without this step, your printer wouldn’t know what to build. So, mastering 3D modeling software is essential for turning your ideas into physical objects accurately and efficiently.
Step-by-Step Process of Creating a 3D Printed Object
Now that you’ve got your 3D model ready, it’s time to prepare the printer by setting up the materials and calibrating the machine. Once everything’s set, the printer will create your object layer by layer.
After printing, you’ll usually need to do some post-processing to finish your piece perfectly.
Designing the 3D Model
Before you can print anything, you need a precise 3D model that tells the printer exactly what to create. Designing this model is your first essential step. You’ll use computer-aided design (CAD) software to build or modify a digital shape.
Here’s a quick rundown:
- Choose your software – options range from beginner-friendly to professional-grade.
- Sketch the basic shape – start simple and add details gradually.
- Refine dimensions – verify measurements fit your requirements perfectly.
- Export the file – save it as an STL or OBJ format, which your printer can read.
Preparing the Printer Setup
Getting your 3D printer ready is a crucial step to guarantee your object comes out just right. First, make sure the build plate is clean and level; an uneven surface can cause print failures. Next, load the filament properly, checking that it feeds smoothly into the extruder.
Preheat the nozzle and bed to the recommended temperatures for your material to ensure proper adhesion. Then, configure your printer’s settings according to your sliced model—this includes layer height, print speed, and infill density. Don’t forget to calibrate the extruder’s steps if needed, so the right amount of filament is extruded.
Finally, double-check all connections and ensure any necessary supports are enabled in the slicing software before you start printing. Proper setup sets the stage for a successful print.
Printing and Post-Processing
Once your printer is set up correctly, you can start the printing process by sending your sliced file to the machine. The printer begins layering material precisely, building your object from the bottom up.
After printing finishes, you’ll need to carefully remove the object from the build plate. Then, post-processing makes sure your print looks its best and functions properly.
Here’s what you’ll typically do:
- Remove support structures carefully without damaging the object.
- Sand or smooth surfaces to eliminate rough edges.
- Clean the print to remove any leftover material or debris.
- Apply finishing touches like painting or sealing for durability and appearance.
Following these steps guarantees a successful print ready for use or display.
Common Applications of 3D Printing Technology
Where can 3D printing technology be found in everyday life? You’ll see it in custom jewelry, rapid prototyping for products, and even in healthcare with personalized implants or prosthetics.
If you’re into gadgets, 3D printing helps create intricate parts quickly and affordably. In education, it’s a hands-on tool for learning design and engineering concepts. You might also encounter it in the automotive and aerospace industries, where it’s used to manufacture lightweight, complex components that traditional methods can’t easily produce.
Even architects use 3D printing to build detailed scale models of their designs. So, whether you’re a hobbyist, a professional, or just curious, 3D printing has applications that can directly impact your life and work with its versatility and efficiency.
Frequently Asked Questions
How Do Temperature Settings Affect 3D Print Quality?
Temperature settings directly impact your 3D print quality by affecting material flow and adhesion. Too hot can cause stringing or warping, while too cold leads to poor layer bonding or clogging. You’ll need to find the right balance.
What Maintenance Is Required for 3D Printers?
You’ll need to regularly clean the print bed, lubricate moving parts, check and tighten belts.
Update firmware, and inspect the nozzle for clogs. Proper maintenance guarantees consistent print quality and extends your 3D printer’s lifespan.
Can 3D Printers Create Multi-Color Objects?
Yes, you can create multi-color objects with 3D printers. Some models have multiple extruders for different filaments, while others use single nozzles with color-changing techniques, letting you design vibrant, multi-colored prints easily.
How Long Does a Typical 3D Print Take?
A typical 3D print can take anywhere from 30 minutes to several hours, depending on the object’s size, complexity, and printer settings.
You’ll find smaller items print faster, while detailed or large ones need more time.
Are There Safety Concerns When Using 3D Printers?
Yes, you should be cautious when using 3D printers. They can emit fumes, get really hot, and pose fire risks.
Always use proper ventilation, avoid direct contact with heated parts, and never leave them unattended.
Conclusion
Now that you’ve seen how 3D printing turns digital dreams into tangible reality, it’s like wielding your own modern-day Excalibur—shaping the future with just a few clicks. Whether you’re crafting prototypes or personal treasures, this technology puts creation at your fingertips.
So, immerse yourself and let your imagination build worlds layer by layer. With 3D printing technology, you’re not just making objects—you’re redefining what’s possible. Embrace the power of 3D printers and unlock endless creative potential in design and manufacturing.