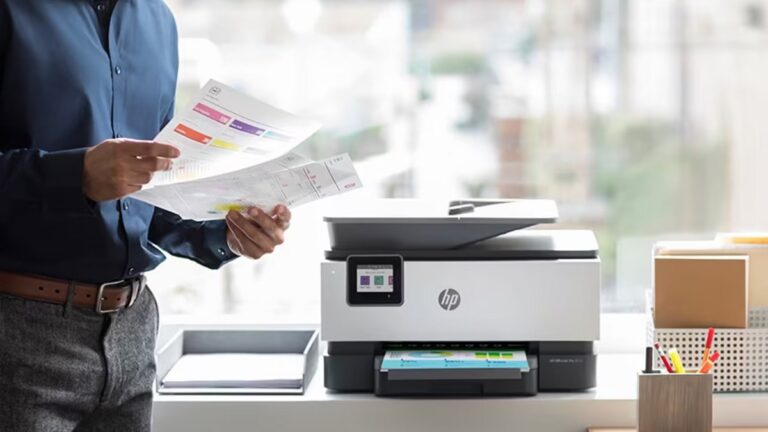
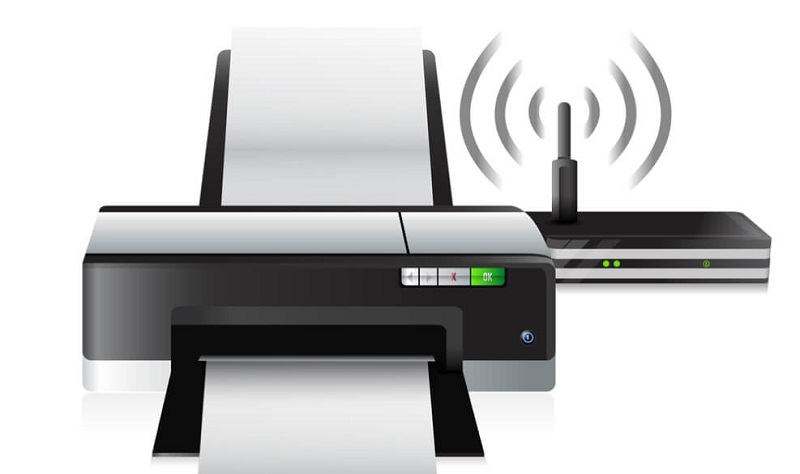
How to Connect Brother Printer to Wifi
To connect your Brother printer to WiFi, first check that it supports wireless networking. Make sure you have your WiFi name and password handy before starting the setup. These details are essential for a smooth connection.
On the printer’s control panel, navigate to Network settings or the Setup Wizard. Select your WiFi network from the list displayed, then enter the password carefully to connect. This process links your Brother printer directly to your wireless network.
Next, install the Brother printer software on your computer. During installation, choose the wireless connection option to ensure proper communication between your devices.
Finally, print a test page to confirm that your Brother printer is connected and working correctly.
If you want to guarantee a smooth setup and troubleshoot any potential issues, keep exploring the full steps and tips. Following detailed instructions can save time and avoid frustration during the connection process.
Key Takeaways
- Power on the Brother printer and access the control panel’s Network or Wireless Setup Wizard menu.
- Select your WiFi network (SSID) from the list and enter the WiFi password using the keypad or on-screen keyboard.
- Confirm the connection status on the printer’s display to ensure successful wireless setup.
- Install the Brother printer driver on your computer, choosing the wireless connection option during setup.
- Print a test page to verify the printer is connected and communicating with the WiFi network.
Check Printer Compatibility and Network Requirements
Before you connect your Brother printer to WiFi, make sure it’s compatible with your network. Check your printer’s model number and verify if it supports wireless connectivity by reviewing the user manual or Brother’s official website. Your printer must support the same WiFi standards as your router, typically 802.11b/g/n, to ensure a stable connection.
Also, confirm that your network operates on a frequency your printer can handle—most Brother printers work with 2.4 GHz networks, while some newer models support 5 GHz. If your network uses advanced security protocols like WPA3, ensure your printer firmware supports them. Finally, your router should be configured to allow new devices to connect, so you don’t run into access restrictions during setup.
Taking these steps prevents compatibility issues before you start connecting.
Prepare Your Brother Printer for WiFi Setup
Before you connect your Brother printer to WiFi, make sure it’s compatible with your network. Power it on and reset any previous network settings to avoid conflicts.
Also, have your network name and password handy for a smooth setup.
Check Printer Compatibility
How can you be sure your Brother printer is ready for a WiFi connection? First, you’ll want to confirm that your model supports wireless networking. Most modern Brother printers do, but it’s best to check.
Look for:
- A built-in WiFi indicator on the control panel
- Wireless setup options in the printer’s menu
- Compatibility details in the user manual or Brother’s website
- Support for WiFi standards like 802.11 b/g/n
- Availability of a wireless network setup wizard
Power On and Reset
Once your Brother printer is plugged in, you’ll want to power it on and perform a reset to clear any previous network settings. This guarantees a smooth WiFi setup without conflicts.
To reset, press and hold the “Go” button for about 10 seconds until all LEDs light up, then release. Your printer will reboot with default settings.
Here’s a quick checklist:
| Step | Action |
|---|---|
| 1 | Plug in the printer |
| 2 | Press the power button |
| 3 | Wait for the printer to initialize |
| 4 | Hold “Go” button for 10 seconds |
| 5 | Release button and wait for reboot |
After this, your printer is ready for the next step in WiFi connection.
Locate Network Information
Since your Brother printer is reset and ready, you’ll need to locate its network information to connect it to your WiFi. This info is essential for a smooth setup and guarantees your printer communicates correctly with your router.
Start by checking the printer’s display panel or control screen, where network details often appear. If your model has no screen, print a network configuration page to find the necessary data. Key details you’ll want to note include:
- SSID (your WiFi network name)
- Network security type (WPA2, WPA3, etc.)
- Password or network key
- IP address assigned to the printer
- MAC address for network identification
Having these ready will speed up your connection process.
Connect Brother Printer Using the Control Panel
Although connecting your Brother printer to Wi-Fi might seem tricky, using the control panel simplifies the process. Start by turning on your printer and pressing the Menu or Settings button on the control panel. Navigate to the Network or WLAN option using the arrow keys and select it.
Choose the “Setup Wizard” or “Wi-Fi Setup” option, then let the printer search for available wireless networks. Select your Wi-Fi network from the list and enter your password using the keypad. Once you confirm the password, the printer will attempt to connect to the network.
After a successful connection, the control panel will display a confirmation message or show the network status. This method lets you connect without needing a computer, making setup straightforward and efficient.
Use Brother Wireless Setup Wizard on Your Printer
You’ll want to start by accessing the Brother Wireless Setup Wizard directly on your printer’s display. This tool guides you through selecting your Wi-Fi network and entering the password.
Following these steps guarantees your printer connects smoothly to your wireless network.
Accessing Setup Wizard
How do you quickly get your Brother printer connected to Wi-Fi? Accessing the Setup Wizard on your printer is the key. Here’s how you do it:
- Power on your Brother printer and ensure it’s ready.
- Press the “Menu” button on the control panel.
- Use the arrow keys to navigate to “Network” or “Wireless” settings.
- Select “Setup Wizard” and press “OK” to launch it.
- Follow the on-screen prompts to find and connect to your Wi-Fi network.
This Setup Wizard guides you step-by-step, making it easy to link your printer to your wireless network without needing extra tools.
Just have your Wi-Fi password handy, and you’ll be printing wirelessly in no time!
Configuring Network Settings
Once you’ve launched the Setup Wizard on your Brother printer, the next step is configuring the network settings to connect it to your Wi-Fi. Use the printer’s touchscreen to select your Wi-Fi network from the list of available connections. If your network doesn’t appear, try updating the list or move the printer closer to your router.
After selecting your network, enter your Wi-Fi password carefully; the wizard will prompt you to type it in using the on-screen keyboard. Once confirmed, the printer attempts to connect to your router. If successful, you’ll see a confirmation message.
If it fails, double-check your password and try again. This setup process ensures your Brother printer communicates wirelessly with your network, enabling you to print from any connected device.
Install Brother Printer Software on Your Computer
Before you can start using your Brother printer wirelessly, it’s important to install the printer software on your computer. This software allows your computer to communicate with the printer and access all its features.
To install it, follow these steps:
- Insert the installation CD that came with your printer or download the latest driver from Brother’s official website.
- Run the setup file and follow on-screen instructions.
- Choose the wireless network connection option when prompted.
- Enter your Wi-Fi network name (SSID) and password.
- Complete the installation by clicking “Finish” and restarting your computer if needed.
Once installed, your computer will recognize the Brother printer on your Wi-Fi network, enabling you to print without cables easily.
Verify Wireless Connection and Print a Test Page
After installing the Brother printer software and connecting your printer to your Wi-Fi network, you’ll want to confirm that everything is functioning correctly. Start by checking the wireless connection status on your printer’s control panel. Then, print a test page to ensure the printer communicates properly with your computer.
Here’s a quick checklist to help you verify your setup:
| Step | Action | Expected Result |
|---|---|---|
| Check Connection | Access printer’s network status | Connected to Wi-Fi |
| Print Test Page | Use printer menu or software | Test page prints correctly |
| Confirm on PC | Open printer properties | Printer shows as online |
Completing these steps means your Brother printer is ready for wireless printing.
Troubleshooting Common WiFi Connection Issues
If your Brother printer isn’t connecting to Wi-Fi, don’t worry—you’re not alone. Here are some quick fixes to get you back online:
- Check your Wi-Fi password: Make sure it’s entered correctly on the printer.
- Restart devices: Power cycle your printer, router, and computer.
- Move closer to the router: Distance or obstacles can weaken the signal.
- Update printer firmware: Outdated software can cause connectivity issues.
- Disable MAC filtering: Your router might be blocking the printer’s access.
Frequently Asked Questions
Can I Connect My Brother Printer to Wifi Without a Computer?
Yes, you can connect your Brother printer to WiFi without a computer by using the printer’s control panel. Just navigate through the network settings, select your WiFi, and enter the password directly on the printer.
This allows you to set up the connection easily without needing any additional devices.
Simply follow the on-screen instructions on the printer’s display to complete the setup.
How Do I Update My Brother Printer’s Firmware?
You can update your Brother printer’s firmware by visiting Brother’s official website, downloading the latest firmware for your model, then running the update tool on your computer while the printer’s connected via USB or network.
Make sure your printer is turned on and connected properly before starting the update process.
Follow the on-screen instructions provided by the update tool to complete the firmware installation.
Is It Possible to Connect Multiple Devices to One Brother Printer?
You can connect a ridiculous number of devices to one Brother printer! Just make sure they’re on the same network, and everyone can print effortlessly.
It’s like having a printing party with endless guests!
Can I Use My Brother Printer With a Mobile Device App?
Yes, you can use your Brother printer with a mobile device app. Brother’s iPrint&Scan app lets you print, scan, and manage your printer directly from your smartphone or tablet, making wireless printing super convenient.
The app supports a variety of Brother printer models and is available for both iOS and Android devices. You simply need to connect your mobile device to the same Wi-Fi network as your printer to get started.
This setup allows you to print documents, photos, and even web pages without needing a computer. Additionally, you can scan documents and send them directly to your mobile device or email.
Using the Brother iPrint&Scan app enhances your printing experience by providing easy access and control on the go. It’s a great tool for both home and office use.
How Do I Reset My Brother Printer’s Network Settings?
To reset your Brother printer’s network settings, dance through the menu to “Network” or “WLAN,” then select “Restore Network Defaults.”
This wipes the slate clean, letting you start fresh with new connections and settings.
Conclusion
Connecting your Brother printer to WiFi might seem tricky, but it’s simpler than you think. Even if you’re not tech-savvy, the step-by-step setup and wireless wizard guide you smoothly through the process.
Once connected, you’ll enjoy the convenience of printing from anywhere in your home or office. Don’t worry about complicated setups—just follow the instructions, and you’ll have your printer online in no time, hassle-free.
In conclusion, setting up your Brother printer to WiFi is straightforward and user-friendly. By following the simple steps, you ensure a seamless wireless printing experience. Get your Brother printer connected to WiFi today and enjoy easy, wireless printing convenience.