How to Use a 3d Printer – Definitive Guide
To use a 3D printer effectively, start by choosing the right printer and setting it up properly with careful calibration. Preparing your digital model is essential; adjust the size and add supports to ensure a successful print.
Next, select the right material like PLA or ABS and configure the temperature and layer settings according to your project needs. Load the filament carefully, then begin printing and watch the first layers closely to ensure quality.
After printing, remove supports and smooth the surface for a polished look. With a bit more insight, you’ll master each step and achieve great results using your 3D printer.
Key Takeaways
- Choose and set up a 3D printer suited to your project, ensuring proper assembly and calibration for reliable printing.
- Prepare or download a 3D model, then scale and add supports using slicing software before exporting a compatible file format.
- Select the appropriate filament or resin, load it correctly, and configure nozzle, bed temperatures, and print speed settings.
- Start the print via USB, SD card, or Wi-Fi, carefully monitoring initial layers and ongoing progress for adhesion and alignment.
- Remove supports post-print, then sand, paint, or seal the object to enhance its appearance and durability.
Understanding the Basics of 3D Printing
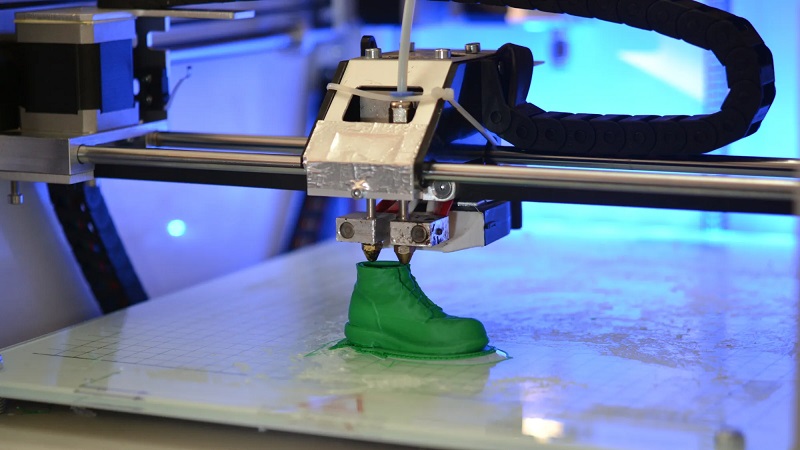
Before you start printing, it’s important to understand how 3D printing works. Essentially, 3D printing builds objects layer by layer from a digital model. You’ll use software to create or download a design, then the printer reads this file and deposits material—usually plastic filament or resin—in precise patterns.
The object gradually takes shape as each thin layer bonds to the previous one. Unlike traditional manufacturing, 3D printing allows you to produce complex shapes without molds or machining. Knowing this helps you appreciate the precision and limitations involved, like layer thickness affecting detail and print time.
Choosing the Right 3D Printer for Your Needs
Although 3D printers come in many types and price ranges, choosing the right one depends on what you want to create and how often you plan to use it. If you’re a beginner, a basic FDM (Fused Deposition Modeling) printer is affordable and great for simple projects. For detailed models or prototypes, consider an SLA (Stereolithography) printer with higher resolution.
Think about print size too—larger build volumes let you make bigger items but usually cost more. If you’ll print frequently, look for a reliable model with good customer support and easy maintenance. Also, check the materials each printer supports; some work only with specific filaments or resins.
Setting Up Your 3D Printer
Now that you’ve picked your 3D printer, it’s time to get it up and running. You’ll need to carefully unbox and assemble the parts, calibrate the printer for accurate prints, and load the filament correctly.
Following these steps will set you up for successful printing.
Unboxing and Assembly
When you open your 3D printer box, you’ll find several components that need to be carefully assembled to guarantee everything works smoothly. Start by reading the manual thoroughly; it guides you through each step. Lay out all parts and check against the included list to verify nothing’s missing.
Typically, you’ll attach the frame, motors, and wiring harnesses, securing them tightly but without overtightening. Connect cables as instructed, matching connectors carefully to avoid damage. Use the provided tools or ones recommended in the manual to assemble parts accurately.
Take your time with this stage—precise assembly prevents future issues. Once complete, double-check all connections and screws. Proper assembly sets the foundation for reliable printing, so be patient and methodical before moving on to calibration.
Calibrating the Printer
Typically, you’ll start calibrating your 3D printer by leveling the print bed and setting the nozzle height. Use the printer’s built-in leveling feature or manually adjust the bed screws so the nozzle is an equal distance from the bed at all points. A common method is sliding a piece of paper between the nozzle and bed; you want slight friction but no resistance.
Next, set the nozzle height (Z-offset) precisely to avoid poor adhesion or nozzle scraping. After leveling, check the printer’s axis movements by running a test print or using calibration patterns to ensure accurate positioning. Finally, verify temperature settings for your printer and materials.
Proper calibration guarantees better print quality and reduces failed prints, so take your time with these steps before moving forward.
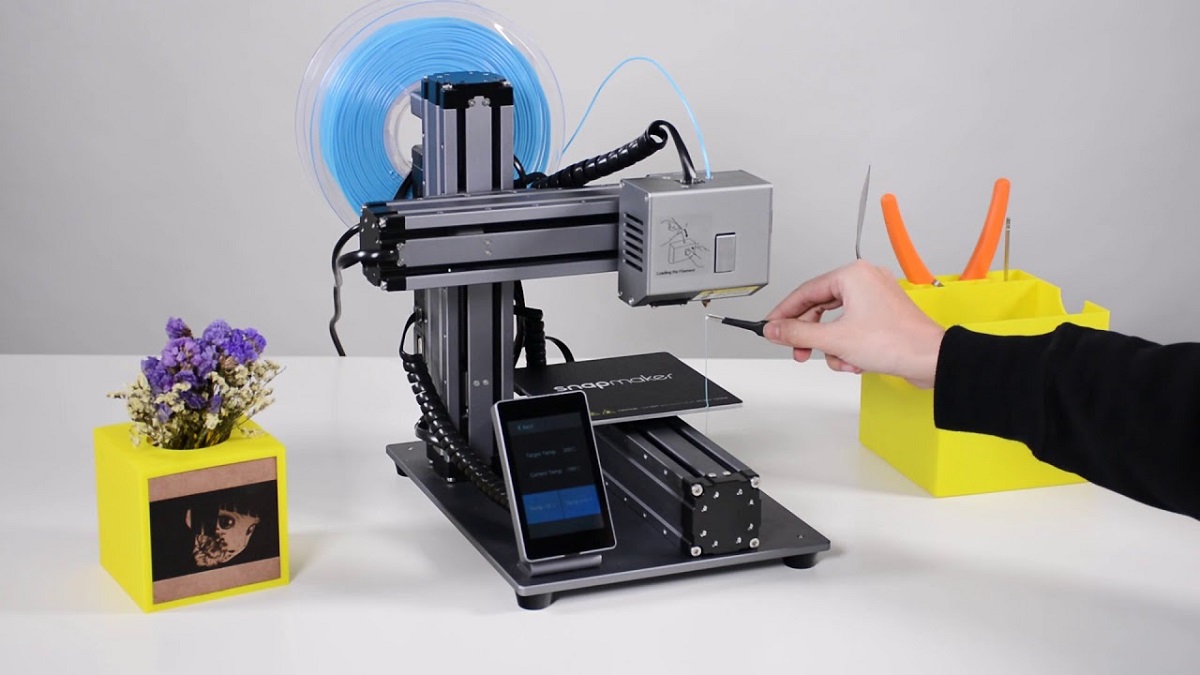
Loading Filament Properly
After confirming your printer is properly calibrated, the next step is loading the filament. Start by selecting the right filament type for your project, making sure it matches your printer’s specifications. Cut the filament tip at an angle to help it feed smoothly into the extruder.
Preheat the printer to the recommended temperature for your filament to prevent jams during loading.
Follow these key steps to load filament properly:
- Insert the filament into the feeder until you feel resistance.
- Engage the extruder mechanism to pull the filament in.
- Watch as the filament extrudes from the nozzle, confirming proper loading.
Taking these steps ensures consistent extrusion and helps avoid clogs, giving you a solid foundation for successful 3D printing.
Preparing Your 3D Model for Printing
Before you start printing, make certain your 3D model is saved in the right file format your printer supports. You’ll also want to adjust the model’s scale to fit your print bed and project needs.
Finally, consider where to add support structures to ensure complex parts print smoothly without collapsing.
File Format Selection
How do you guarantee your 3D model is ready for printing? Choosing the right file format is vital. Different printers and slicing software prefer specific formats that ensure your design translates correctly into a physical object.
The most common formats include STL, OBJ, and 3MF. Each has its advantages and compatibility considerations.
- STL (Stereolithography): Widely supported, ideal for simple shapes but lacks color and texture data.
- OBJ (Object File): Supports color and texture, great for detailed models requiring appearance accuracy.
- 3MF (3D Manufacturing Format): Modern format that includes model, color, and material info, streamlining the printing process.
Pick the format that best matches your printer’s requirements and the detail level needed for your print.
Model Scaling Adjustment
When you’re preparing your 3D model for printing, adjusting its scale is crucial to guarantee it fits your intended dimensions and printer capabilities. Start by importing your model into your slicing software, where you can easily resize it. Use precise measurements to scale the model up or down, ensuring it won’t exceed your printer’s build volume.
Keep proportions intact by locking aspect ratios unless you need to alter specific dimensions. Remember, scaling too small can cause loss of detail, while scaling too large might lead to longer print times or structural issues. Double-check the final size against your project requirements before proceeding.
This step ensures your print will come out just as you envision, saving time and material.
Support Structures Placement
Although your model might look ready to print, adding support structures is essential to guarantee overhangs and complex shapes come out cleanly. Without supports, parts of your print that extend horizontally or at steep angles may sag or fail entirely. When placing supports, you should focus on areas that lack a solid foundation underneath.
Here are key points to contemplate:
- Identify overhangs exceeding 45 degrees that need support.
- Place supports sparingly to minimize post-print cleanup.
- Use your slicer software’s preview to adjust support density and pattern.
Selecting the Appropriate Printing Material
Before you start printing, you’ll need to choose the right material based on your project’s requirements. Different materials offer unique properties like strength, flexibility, and finish. Consider what your final product needs—durability, detail, or flexibility—to pick the best option.
Here’s a quick guide to common 3D printing materials:
| Material | Best For |
|---|---|
| PLA | Beginners, detailed models |
| ABS | Durable parts, heat resistance |
| PETG | Flexible, chemical resistant |
| TPU | Elastic, wearable items |
Selecting the appropriate material ensures your print performs well and looks great. Keep your project’s purpose in mind to make the best choice without trial and error.
Configuring Printer Settings for Optimal Results
Since every 3D printer and material behaves differently, you’ll need to fine-tune your printer settings to achieve the best results. Start by adjusting the temperature settings for both the nozzle and the heated bed, matching them to your filament type.
Next, set the layer height to balance print quality and speed—smaller layers yield finer details but take longer. Don’t forget to calibrate the print speed, as moving too fast can cause defects.
Key settings to configure include:
- Nozzle and bed temperature: Ensure proper adhesion and extrusion
- Layer height: Optimize detail without sacrificing print time
- Print speed: Balance quality and efficiency
Fine-tuning these will help you get consistent, high-quality prints every time.
Starting and Monitoring the Printing Process
Once you’ve configured your settings and prepared your printer, you’re ready to start the print job. Begin by sending the file to your printer via USB, SD card, or Wi-Fi, depending on your model. Then, initiate the print through your printer’s interface or software.
As printing starts, keep an eye on the first few layers to ensure proper adhesion and alignment. Monitor the nozzle temperature and bed heating to avoid warping or clogs. Stay nearby during the initial phase to catch issues early, like filament jams or layer shifting.
Throughout printing, periodically check the progress but avoid touching the moving parts. If your printer has a camera, use it to watch remotely. This careful attention helps guarantee a successful, high-quality print from start to finish.
Post-Processing and Finishing Your 3D Printed Object
After your print finishes, the work isn’t quite over. Post-processing is key to making your 3D printed object look polished and functional. First, carefully remove any support structures without damaging your print.
Then, sanding helps smooth out rough surfaces and layer lines. Finally, you can paint or apply a finish to enhance the appearance and protect your object.
Here are three essential post-processing steps to follow:
- Support Removal: Use pliers or cutters to gently detach supports.
- Sanding: Start with coarse grit and gradually move to finer grit sandpaper.
- Finishing: Apply primer, paint, or sealant depending on your desired look.
Taking these steps will ensure your 3D prints not only function well but also look professional.
Frequently Asked Questions
How Do I Troubleshoot Common 3D Printer Errors?
You’ll want to check your printer’s calibration, clean the nozzle, and guarantee the filament feeds smoothly.
Also, verify your print settings and bed leveling. If problems persist, consult the printer’s manual or online forums for specific fixes.
What Safety Precautions Should I Take While 3D Printing?
Remember when you learned to ride a bike? Just like wearing a helmet, 3D printing needs safety goggles, good ventilation, and avoiding touching hot parts.
These precautions keep you safe while your ideas take shape.
Can I Recycle Failed 3D Prints?
Yes, you can recycle failed 3D prints, but it depends on the material. Some filaments like PLA can be shredded and reused with special machines, while others might need to be disposed of properly.
How Do I Maintain and Clean My 3D Printer?
You should regularly clean the nozzle, remove filament residue, and lubricate moving parts. Check belts and screws for tightness. Also, keep the print bed clean and recalibrate it often to guarantee consistent print quality.
What Software Updates Are Recommended for My 3D Printer?
You should regularly update your printer’s firmware and slicing software to the latest versions. These updates improve performance, fix bugs, and add new features, ensuring your 3D printer runs smoothly and produces high-quality prints.
Conclusion
Now that you know the basics, it’s easy to see why some believe 3D printing will revolutionize manufacturing entirely. While it’s true that 3D printers offer incredible customization and speed, they’re not quite ready to replace traditional methods completely—yet.
By mastering your printer’s setup, materials, and settings, you’ll discover amazing creative potential. So, don’t just wonder if 3D printing is the future—start printing and find out for yourself! Embracing 3D printing technology can unlock new possibilities in design and production, making it an essential skill for modern manufacturing.