How to Change Toner in Brother Printer
When your Brother printer shows a low toner warning or prints faded pages, it’s time to replace the toner cartridge. Changing toner in a Brother printer is a simple process that anyone can do at home.
First, power off the printer and open the toner compartment.
Gently remove the old cartridge and carefully shake the new one to distribute toner inside.
Slide the new cartridge in until it clicks, close the cover, then reset the toner counter by holding “OK.”
After that, do a test print to ensure everything’s working properly.
To get the full step-by-step process, keep going.
Key Takeaways
- Power off the Brother printer and open the toner compartment carefully to access the cartridge.
- Remove the old toner cartridge by pulling it out gently and place it on a disposable surface.
- Shake the new toner cartridge side to side to evenly distribute the toner inside.
- Insert the new toner cartridge into the compartment until it clicks, then close the cover securely.
- Reset the toner counter via the control panel and perform a test print to confirm proper installation.
Identifying When to Replace Toner
Although your Brother printer usually alerts you when toner is low, you can also tell by the print quality—faded or streaky pages mean it’s time to replace the toner cartridge. If you notice text appearing lighter than usual or lines running through your prints, these are clear signs that the toner is running out.
Additionally, if the printer displays a “Replace Toner” message or flashes the toner light, it’s an unmistakable prompt. Keep in mind that even if some pages print fine, inconsistent print quality can indicate uneven toner distribution.
Regularly checking your printouts helps you catch these signs early, preventing unexpected interruptions. Being proactive ensures your documents always look sharp and professional without sudden toner depletion.
Gathering Necessary Supplies
What do you need before changing the toner in your Brother printer? First, make sure you have the correct replacement toner cartridge designed for your specific Brother model. Using the wrong cartridge can cause damage or poor print quality.
You’ll also want a clean, flat workspace covered with old newspapers or paper towels to catch any toner spills. Keep a pair of disposable gloves handy to avoid getting toner on your hands. It’s helpful to have a soft, lint-free cloth nearby to gently wipe any toner dust inside the printer.
Avoid using water or cleaning solvents. Finally, gather any tools your printer’s manual might recommend, though most Brother models don’t require special tools for toner replacement. Having these supplies ready will make the process smoother and cleaner.
Preparing Your Brother Printer
Before you start, make sure to power off your Brother printer to guarantee safety.
Next, locate and open the toner compartment carefully.
This will give you easy access to the toner cartridge for replacement.
Power Off Printer
Since you’ll be handling sensitive components inside your Brother printer, you should always power it off completely before starting. This prevents any electrical issues and guarantees your safety as well as the printer’s.
Here’s how to properly power off your printer:
- Press the power button to turn the printer off.
- Wait for all lights to stop blinking and the printer to fully shut down.
- Unplug the power cord from the electrical outlet to avoid accidental power-ons.
- Allow the printer to cool down for a few minutes if it was recently in use.
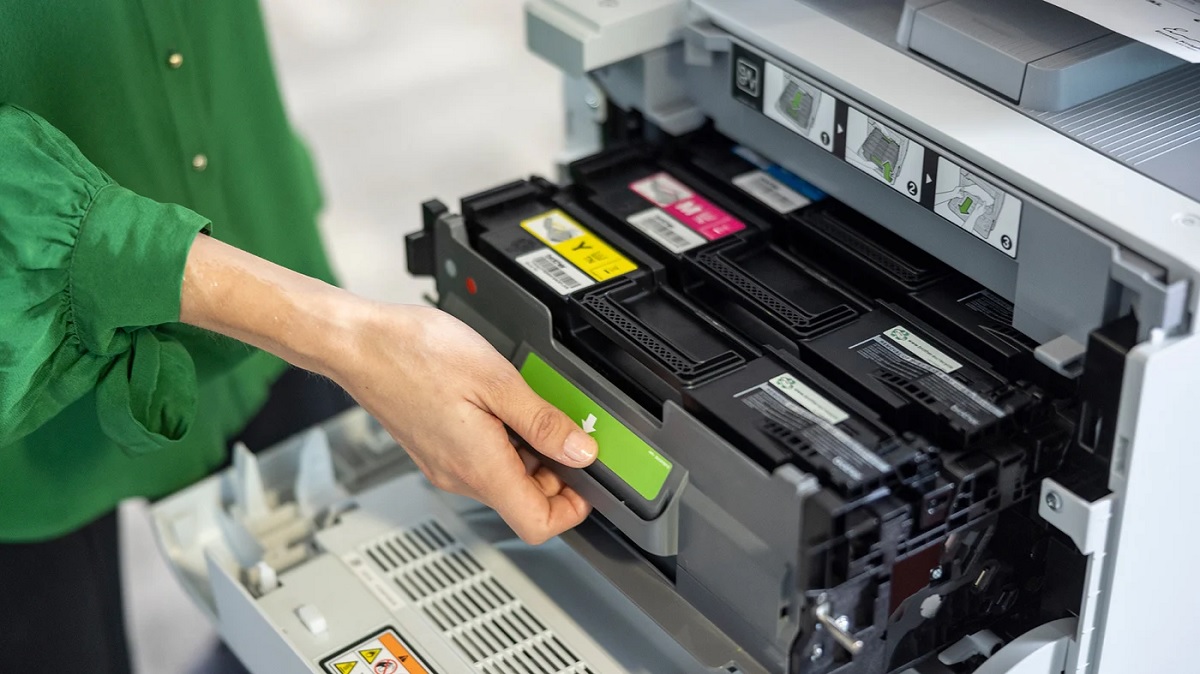
Open Toner Compartment
After powering off your printer and ensuring it’s cool, you can open the toner compartment to access the toner cartridge. Locate the front cover or panel on your Brother printer—it usually swings open or lifts up. Gently pull or press the release latch, depending on your model, to release the compartment.
Be careful not to force it, as this could damage the printer. Once open, you’ll see the toner cartridge inside, ready for removal or replacement. If the compartment has a protective cover over the cartridge, open that as well.
Keep the area clean to avoid toner spills. Now that the toner compartment is open, you’re ready to remove the old cartridge and install a new one.
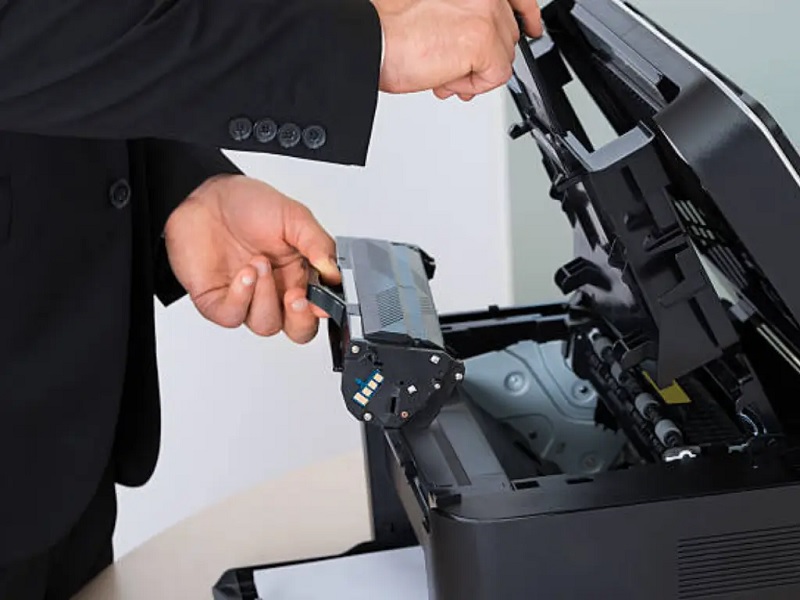
Removing the Old Toner Cartridge
When you’re ready to replace the toner, you’ll need to carefully remove the old cartridge to avoid spills or damage. Start by gently grasping the toner cartridge handle. Then, slowly pull it straight out from the printer.
Be sure to keep it level to prevent toner powder from spilling. If you notice any toner dust, avoid touching it with your skin.
Here are some tips to safely remove the old toner cartridge:
- Do not shake or tilt the cartridge excessively.
- Place a disposable cloth or paper towel nearby to catch any stray toner.
- Avoid exposing the cartridge to direct sunlight or bright light.
- Handle the cartridge by its designated handle, not the drum unit.
Following these steps helps keep your workspace clean and your printer safe.
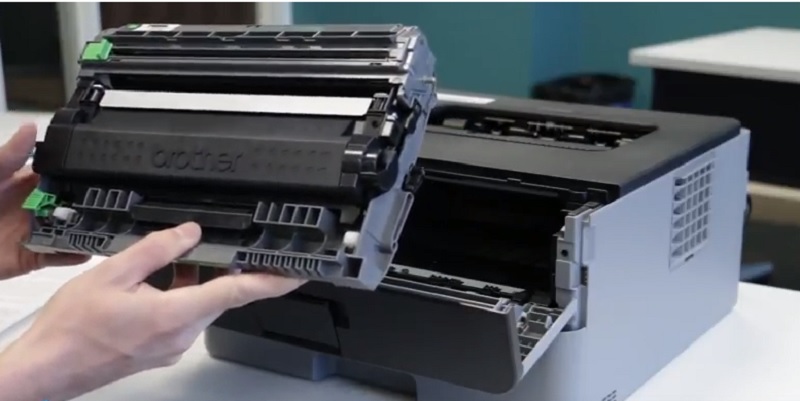
Installing the New Toner Cartridge
Although removing the old toner cartridge is an important step, installing the new one correctly is essential to guarantee your Brother printer works smoothly. First, take the new toner cartridge out of its packaging and gently shake it side to side to evenly distribute the toner inside. Remove any protective covers or seals as indicated in the instructions.
Next, align the toner cartridge with the slots inside the printer’s drum unit, making sure it fits snugly. Slide the cartridge firmly into place until you hear it click, ensuring it’s fully seated. Close the printer cover carefully.
Proper installation prevents toner leaks and printing errors, so take your time during this step to keep your printer running efficiently.
Resetting the Toner Counter
Once you’ve installed the new toner cartridge, you’ll need to reset the toner counter to make certain your printer accurate. This guarantees your Brother printer knows the toner is fresh and can track usage properly.
Let’s go over when and how to reset the toner counter step-by-step.
When to Reset
Even if you’ve just replaced the toner cartridge, you’ll need to reset the toner counter to guarantee your Brother printer accurately tracks ink usage. Resetting ensures the printer’s alerts and print quality remain reliable.
You should reset the toner counter in these situations:
- After installing a new toner cartridge to avoid false low-toner warnings.
- When the printer displays a “Toner End Soon” or “Replace Toner” message, but you’ve already replaced the cartridge.
- If print quality issues persist despite a new cartridge, indicating a misread toner level.
- Whenever you want to maintain accurate maintenance records for your printer.
Knowing when to reset helps avoid unnecessary replacements and keeps your Brother printer running smoothly.
Resetting Steps Guide
Before you start printing again, you’ll need to reset the toner counter to guarantee your Brother printer correctly recognizes the new cartridge.
Here’s a simple step-by-step guide to get you through the process quickly:
| Step | Action | Notes |
|---|---|---|
| 1 | Open the front cover | Ensure printer is on |
| 2 | Press and hold “OK” | Hold for about 2 seconds |
| 3 | Release “OK” when display changes | Look for “Replace Toner?” message |
| 4 | Press “OK” again to confirm | Counter resets |
| 5 | Close the front cover | Ready to print |
Follow these steps exactly, and your Brother printer will reset the toner counter, so it won’t show false low toner warnings.
This helps maintain accurate toner level tracking.
Testing Your Printer After Replacement
Although you’ve just replaced the toner, you’ll want to make certain your Brother printer is working properly by running a test print. This helps confirm that the toner is installed correctly and the printer is functioning as expected.
To test your printer after replacement, follow these steps:
- Navigate to the printer’s control panel and select “Print Test Page” or “Printer Settings.”
- Ensure the print quality is clear, without streaks or smudges.
- Check that the toner level indicator displays the new toner cartridge correctly.
- If issues arise, try cleaning the drum unit or reinstalling the toner cartridge.
Running a test print saves time and prevents wasted paper, confirming your printer is ready for all your printing needs.
Frequently Asked Questions
Can I Use Third-Party Toner Cartridges in My Brother Printer?
Yes, you can use third-party toner cartridges in your Brother printer, but be aware they might affect print quality or void your warranty.
Always choose reputable brands to avoid potential damage or compatibility issues with your device.
How Do I Dispose of Old Toner Cartridges Properly?
You should recycle your old toner cartridges by taking them to designated e-waste or office supply stores. Many Brother printers include return programs, so check their website for free shipping labels to dispose of cartridges responsibly.
Proper disposal helps prevent environmental pollution and conserves resources. Some manufacturers also offer mail-back recycling services. Always avoid throwing toner cartridges in the regular trash.
What Should I Do if My Toner Cartridge Leaks Inside the Printer?
If your toner cartridge leaks inside the printer, turn it off and unplug it first. Carefully clean the spill with a soft, dry cloth. Avoid using water or chemicals.
Then replace the cartridge with a new one.
How Long Does a Typical Toner Cartridge Last?
You’ll find a typical toner cartridge gracefully lasts around 1,500 to 3,000 pages, depending on your printing habits.
Can Toner Cartridges Expire if Not Used?
Yes, toner cartridges can expire if not used. Over time, the toner powder may clump or degrade, affecting print quality.
You’ll want to check the expiration date and store cartridges properly to keep them fresh.
Conclusion
Changing the toner in your Brother printer is as easy as flipping a switch once you know the steps. By spotting when the toner’s low, gathering your supplies, and carefully swapping cartridges, you’ll keep your prints sharp and clear.
Don’t forget to reset the toner counter to avoid false alerts. After you’re done, run a quick test print to make sure everything’s working smoothly. With these tips, your printer will be ready to go in no time!
Following these steps will ensure your Brother printer remains efficient and produces high-quality prints. Remember, knowing how to change toner in Brother printer is essential for maintaining optimal performance and prolonging your printer’s life.