How to Add Printer to Computer
To add a printer to your computer, first check if it’s compatible with your operating system. Connecting a printer can be done via USB or wirelessly by joining the same Wi-Fi network. Ensuring compatibility and connection type is essential for a smooth setup.
Your system may install basic drivers automatically, but downloading full drivers from the manufacturer’s site guarantees all features work.
Set the printer as default if needed, then print a test page to confirm everything’s working. This helps verify that the printer is properly added and ready to use.
Keep going to explore easy ways to troubleshoot and customize your printer settings. Adjusting settings can optimize your printing experience. Troubleshooting tips will help resolve common issues quickly.
Key Takeaways
- Verify printer compatibility with your computer’s operating system before starting the setup process.
- Connect the printer via USB, Ethernet, or wireless network according to the printer’s supported connection types.
- Access the computer’s settings or control panel to find the “Add Printer” or “Printers & Scanners” option.
- Follow on-screen prompts to install necessary drivers automatically or manually download them from the manufacturer’s website.
- Complete the installation, set the printer as default if desired, and perform a test print to confirm successful setup.
Check Printer Compatibility
Before you connect a printer to your computer, you’ll want to make sure it’s compatible with your system. Check the printer’s specifications to see if it supports your operating system, whether it’s Windows, macOS, or Linux. Compatibility information is usually on the manufacturer’s website or the printer’s box.
Also, verify if your computer has the necessary drivers available; these allow your system to communicate with the printer properly. Sometimes, older printers might not support newer operating systems, so it’s important to confirm this beforehand. Additionally, consider the connection types the printer supports, like wireless or Ethernet, since this will affect setup options.
Taking these steps guarantees you won’t run into issues when you’re ready to add the printer to your computer.
Connect Printer to Computer via USB
Connecting your printer to your computer via USB is often the quickest and simplest method. First, make sure both your computer and printer are turned off. Locate the USB cable that came with your printer.
Plug one end into the printer’s USB port and the other into an available USB port on your computer. Once connected, power on your printer and then your computer. Your operating system should automatically detect the new device and attempt to install necessary drivers.
If prompted, follow any on-screen instructions to complete the setup. If your system doesn’t recognize the printer, visit the printer manufacturer’s website to download and install the latest drivers manually. Once installed, your printer will be ready to use immediately via the USB connection.
Add a Wireless Printer to Your Network
While using a USB cable is a straightforward way to set up your printer, you might prefer the convenience of a wireless connection. To add a wireless printer, first make sure your printer is powered on and connected to the same Wi-Fi network as your computer. Most printers have a built-in menu to select your Wi-Fi network and enter the password.
Once connected, your computer should detect the printer automatically.
| Step | Action |
|---|---|
| 1 | Turn on printer |
| 2 | Access printer’s Wi-Fi settings |
| 3 | Connect to your wireless network |
| 4 | Confirm connection on printer |
| 5 | Search for printer on your computer |
After this, you’re ready to proceed with driver installation.
Install Printer Drivers and Software
Once your computer detects the printer, you’ll need to install the appropriate drivers and software to guarantee it works correctly. Usually, your operating system will attempt to install basic drivers automatically. However, for full functionality—like scanning or advanced settings—you’ll want the official software from the printer manufacturer.
Visit the printer brand’s website, locate the support or downloads section, and enter your printer model. Download the latest drivers compatible with your OS version. Run the installer and follow the prompts carefully, connecting the printer when requested.
Installing the full software package ensures your printer operates smoothly and grants access to all features. Avoid skipping this step to prevent errors or limited printer capabilities. Once installed, your printer will be ready for use.
Set the Printer as Default
| Step | Windows | Mac |
|---|---|---|
| 1. Open Settings | Settings > Devices | System Preferences |
| 2. Select Printer | Printers & scanners | Printers & Scanners |
| 3. Choose Printer | Click your printer | Select your printer |
| 4. Set Default | Click “Set as default” | Choose “Set as Default Printer” |
| 5. Confirm | Check default printer status | Confirm default printer set |
Troubleshoot Printer Connection Issues
If your printer isn’t connecting, first make sure it’s compatible with your computer. You’ll also want to check for any network conflicts that might be blocking the connection.
These steps can help you quickly identify and fix common issues.
Check Printer Compatibility
How do you know if your printer will work with your computer? First, check the printer’s specifications to see if it supports your operating system—whether it’s Windows, macOS, or Linux. Compatibility info is usually on the box or the manufacturer’s website.
Also, verify the connection types your computer supports, like USB, Wi-Fi, or Bluetooth, and make sure the printer offers those options. Don’t forget to look for updated drivers for your OS version; outdated drivers can cause issues.
If your printer is older, it might not support modern protocols or software, so double-check before buying. Ensuring compatibility upfront saves you time and frustration when setting up your printer and helps avoid connection problems later on.
Resolve Network Conflicts
Ensuring your printer is compatible is just the first step; sometimes network issues can still prevent a successful connection. To resolve network conflicts, start by checking that your printer and computer are on the same Wi-Fi network. If they aren’t, switch them to the same network.
Next, restart your router, printer, and computer to refresh connections. Make sure your firewall or antivirus software isn’t blocking the printer’s access. You can temporarily disable these security features to test.
Also, assign a static IP address to your printer to avoid IP conflicts. If you continue facing issues, try running your computer’s built-in network troubleshooter. Following these steps should clear most network conflicts and get your printer connected smoothly.
Print a Test Page to Confirm Setup
Now that your printer is connected, you’ll want to locate the printer settings on your computer. From there, you can execute a test print to make sure everything’s working correctly.
This quick step helps confirm your setup before you start printing important documents.
Locate Printer Settings
Here’s a quick guide:
| Operating System | Access Method | Typical Location |
|---|---|---|
| Windows | Start Menu > Settings | Devices > Printers & Scanners |
| MacOS | Apple Menu > System Prefs | Printers & Scanners |
| Linux | System Settings | Printers or Print Settings |
Navigating here guarantees you can easily manage your printer before testing the connection.
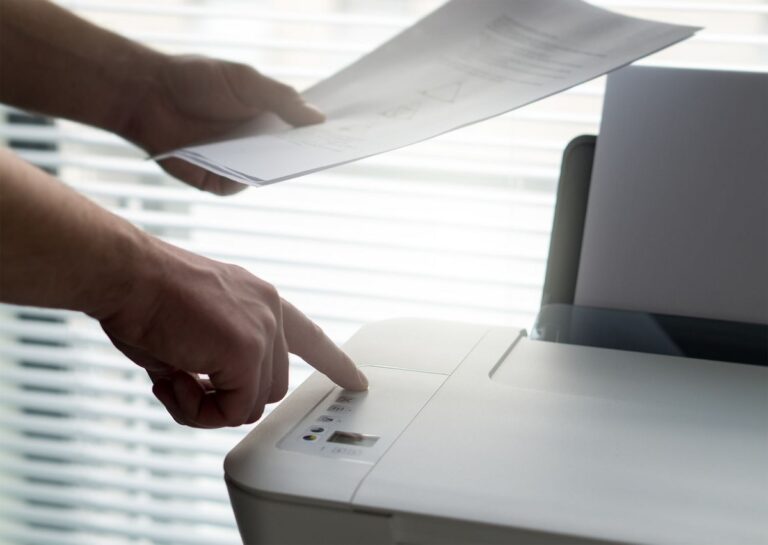
Execute Test Print
Although you’ve added your printer, you’ll want to print a test page to confirm it’s set up correctly. This step guarantees your computer and printer communicate properly and that the printer produces quality output.
To do this, open the printer settings on your computer—usually found under “Devices and Printers” or “Printers & Scanners.” Select your newly added printer, then look for an option like “Print Test Page.” Click it, and your printer should start printing a sample page.
Check the test print for clarity, correct colors, and alignment. If the page prints without issues, your setup is successful. If not, revisit your printer connection or driver installation to troubleshoot before you start regular printing tasks.
Manage Printer Settings and Preferences
Once you’ve added a printer to your computer, you’ll want to customize its settings to match your needs. To do this, open the Control Panel or Settings app, then go to “Devices” or “Printers & scanners.”
Select your printer, and click on “Manage” or “Printer properties.” Here, you can adjust preferences like paper size, print quality, color options, and default tray. You can also set your printer as the default device to save time.
Explore advanced settings for duplex printing, layout, and maintenance tasks such as cleaning print heads. Managing these options guarantees your prints come out exactly how you want, improving efficiency and reducing waste.
Don’t forget to save your changes before exiting to apply your customized settings.
Frequently Asked Questions
Can I Add Multiple Printers to One Computer?
Yes, you can add multiple printers to one computer. You just need to install each printer’s drivers and connect them either via USB or network.
Then, you can choose which printer to use when printing documents.
How Do I Share My Printer With Other Devices?
You can share your printer by enabling printer sharing in your computer’s settings.
Go to Control Panel or System Preferences, select your printer, and turn on sharing so other devices on the network can access it easily.
What if My Printer Doesn’T Have Drivers for My OS?
If your printer lacks drivers for your OS, you can try using generic drivers, check the manufacturer’s website for updates, or use compatibility mode.
Alternatively, consider third-party drivers or connecting via network sharing from a compatible device.
Can I Add a Printer to a Tablet or Smartphone?
Yes, you can add a printer to your tablet or smartphone. Just make sure your printer supports wireless printing or has a compatible app, then connect both devices to the same Wi-Fi network for easy setup and printing.
How Do I Update My Printer’s Firmware?
Think of your printer as a ship needing its sails tuned—head to the manufacturer’s website, download the latest firmware, and follow their update guide.
This keeps your printer sailing smoothly and printing flawlessly every time.
Conclusion
Now that you’ve added your printer, you’re ready to print like it’s the age of the typewriter—only faster and way quieter. Just remember to keep those drivers updated and double-check your connection if things go sideways.
Setting your printer as the default saves you time, and printing a test page guarantees everything’s working smoothly. With a bit of patience, you’ll have your printer running like a charm in no time.
Happy printing! Adding a printer to your computer is straightforward, and following these steps ensures you get the best performance from your device. Keep your printer drivers updated to maintain compatibility and avoid connection issues.