How to Change Ink in Canon Printer
To change ink in your Canon printer, start by turning the printer on and opening the cartridge access panel. This allows the cartridge holder to move to the center, making it accessible.
Next, gently press the tab on the old cartridge to release it, then carefully lift it out.
Unpack your new cartridge and remove any protective tape before inserting it.
Push the new cartridge in until it clicks securely into place.
Finally, close the access panel and run a test print to ensure everything is working correctly.
You can find more helpful tips to keep your printer running smoothly right away.
Key Takeaways
- Power on the Canon printer and wait for the cartridge holder to move to the accessible position.
- Open the cartridge access panel carefully without forcing any parts.
- Press the tab to release and gently remove the old ink cartridge by lifting it straight out.
- Unpack the new cartridge, remove protective tape, match colors, and insert until it clicks firmly.
- Close the access panel and perform a test print or nozzle check to ensure proper ink installation.
Identifying Your Canon Printer Model
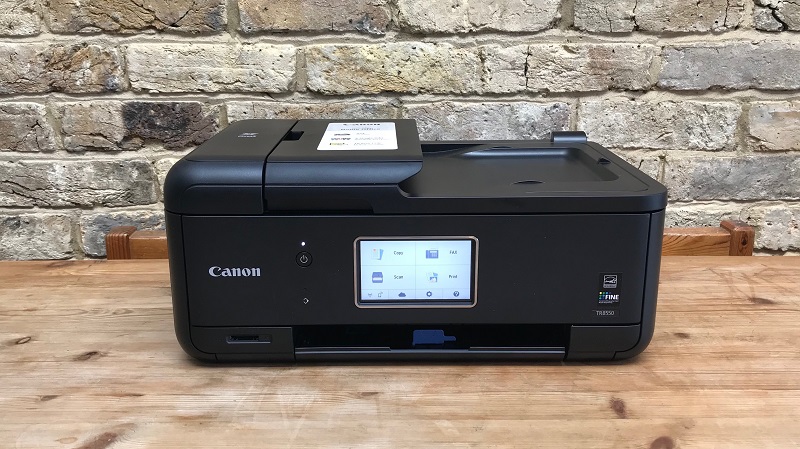
How do you know which Canon printer model you have? First, check the front or top of your printer—Canon usually places the model number there, often near the logo. If you don’t see it, look on the back or bottom for a label or sticker with detailed information.
You might find a series of numbers and letters indicating the exact model. Another quick way is to power on the printer and navigate through the menu screen; many models display their name or number in the settings or info section. If you’ve installed software on your computer, the printer model often appears in the printer settings or control panel.
Knowing your exact model is essential because ink cartridges and replacement procedures vary between Canon printers.
Preparing to Replace Ink Cartridges
Before you start, make sure you have the new ink cartridges and any tools you might need nearby. Turn on your Canon printer to get it ready for the replacement process.
Then, carefully open the cartridge access panel to reach the old cartridges.
Gather Necessary Supplies
Although replacing ink cartridges is straightforward, gathering the necessary supplies beforehand will make the process smoother and faster. First, make sure you have the correct replacement cartridges for your Canon printer model. Check your printer manual or the cartridge packaging to confirm compatibility.
It’s also helpful to have a clean, dry cloth or paper towel ready to wipe any ink spills or smudges. Keep some disposable gloves nearby if you want to avoid getting ink on your hands. Have a small trash bag or container handy to safely dispose of the old cartridges.
Finally, a well-lit and clean workspace will help you see clearly and prevent accidental messes. Having everything within reach will save you time and hassle during the replacement.
Power On Printer
Once you’ve gathered your supplies, power on your Canon printer to prepare for replacing the ink cartridges. Make sure the printer is plugged in and press the power button. Wait for the printer to complete its startup routine—this usually takes a few moments.
The printer’s display or indicator lights will let you know when it’s ready. It’s important to turn on the device first because the cartridge holder needs to move into the correct position for removal and replacement. Avoid turning off the printer during this process, as it could cause mechanical issues.
If your printer has a touchscreen or control panel, follow any on-screen prompts related to ink maintenance or cartridge replacement once it’s powered on. This step ensures a smooth and safe ink change.
Open Cartridge Access Panel
How do you access the ink cartridges on your Canon printer? First, make sure your printer is powered on. Then, locate the cartridge access panel, usually on the front or top of the printer.
Gently lift or slide this panel open; it should open easily without force. Once open, the cartridge holder will move to the center or become visible, allowing you to reach the cartridges. Avoid touching any internal components to prevent damage.
If the panel doesn’t open, check your printer’s manual for model-specific instructions. Opening the cartridge access panel properly is essential before you can replace or inspect the ink cartridges. Once open, you’re ready to proceed with removing the old cartridges and installing new ones safely.
Accessing the Ink Cartridge Compartment
Before you can replace the ink cartridge, you’ll need to access the compartment where it sits. After opening the cartridge access panel, wait a few seconds for the cartridge holder to move to the replacement position automatically. This movement guarantees you can reach the cartridges without difficulty.
Make sure the printer is powered on; otherwise, the holder won’t move. Avoid forcing the holder manually, as it might damage internal parts. Once the holder stops moving, you’ll see the ink cartridges clearly, usually arranged side by side.
The compartment is typically located inside the printer, so keep your hands steady and avoid touching other components. Now you’re ready to work with the cartridges safely and efficiently.
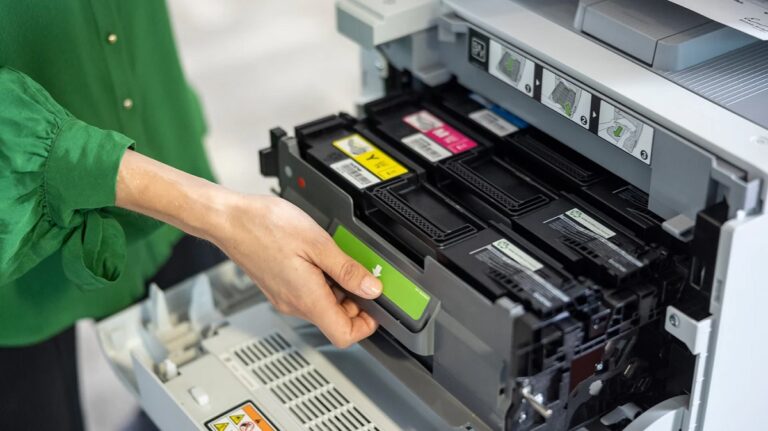
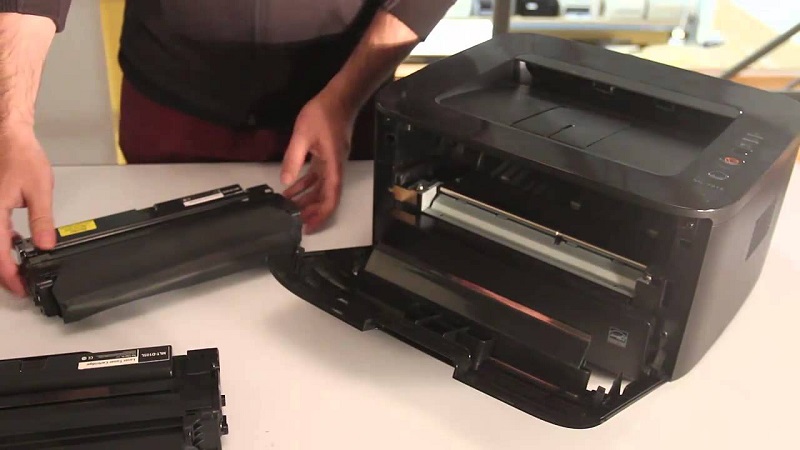
Removing the Old Ink Cartridges
With the ink cartridge holder in place, you can now focus on removing the old cartridges. Gently press down on the tab or lever securing the cartridge; this releases it from its slot. Carefully lift the cartridge straight out to avoid any ink spills or damage.
If your Canon printer uses multiple cartridges, remove each one following the same method, starting with the black cartridge if applicable. Handle cartridges by their sides to keep your hands clean and prevent smudging. Place the removed cartridges on a protected surface or packaging to avoid leaks.
Be sure not to force any cartridge out, as this could damage the holder. Once all old cartridges are removed, your printer is ready for the next step in the ink replacement process.
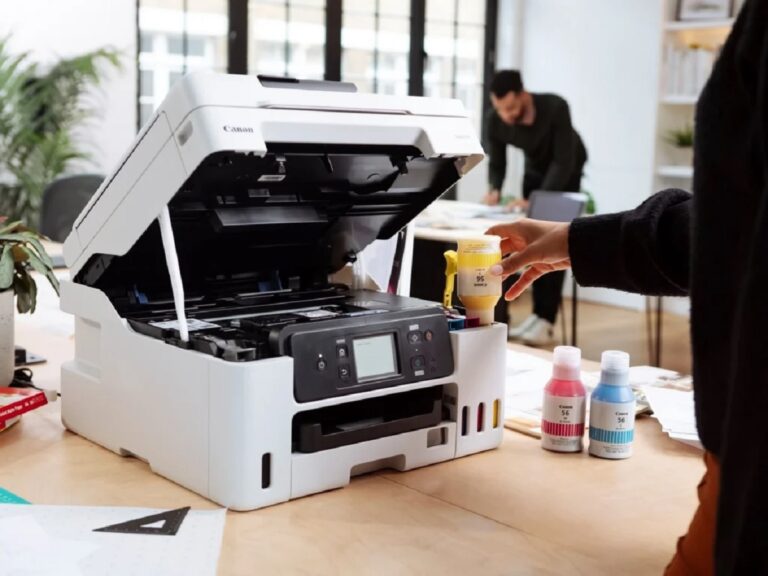
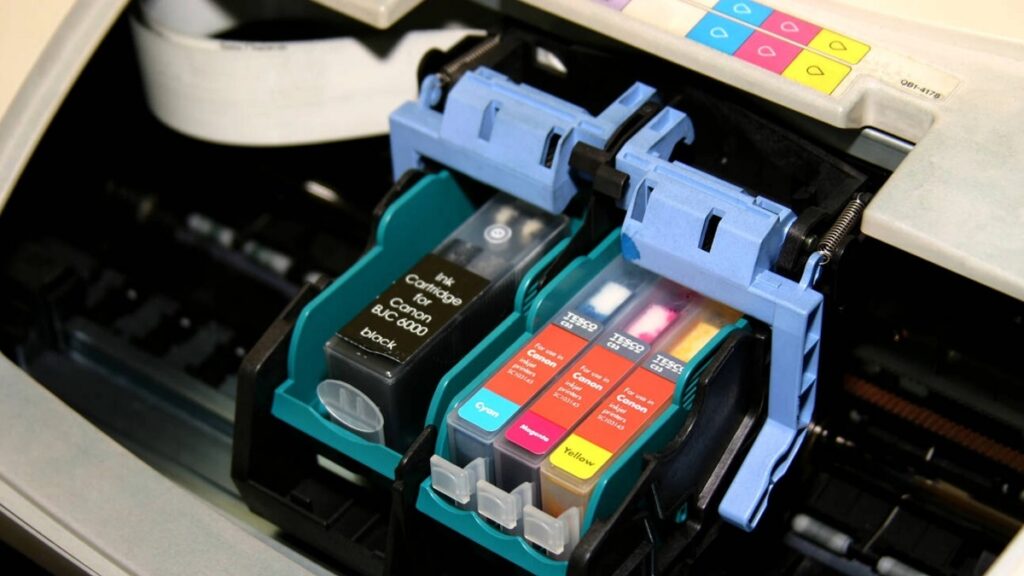
Installing New Ink Cartridges
Once you’ve removed the old cartridges, you’re ready to install the new ones. First, unpack the new ink cartridges carefully, avoiding touching the copper contacts or nozzles to prevent damage or poor print quality. Remove any protective tape or covers from the cartridges.
Then, align each cartridge with its corresponding slot inside the printer, matching color labels to ensure correct placement. Gently insert the cartridge into the slot until it clicks into place, indicating it’s securely installed. Repeat this for each cartridge you’re replacing.
After all cartridges are installed, close the printer cover firmly. Your Canon printer will usually recognize the new cartridges automatically, preparing them for use. Avoid forcing cartridges in, as this could damage the printer or cartridges.
Performing a Test Print After Replacement
After installing your new ink cartridges, you’ll want to make certain everything’s working properly by performing a test print. This step confirms the cartridges are seated correctly and that the ink flows smoothly. First, close the printer cover and turn the printer on if it’s not already.
Access your printer’s control panel or software on your computer, then locate the “Maintenance” or “Tools” section. Select “Print Test Page” or “Nozzle Check.” The printer will print a page showing color blocks or patterns.
Check this page carefully for any streaks, missing colors, or irregularities. If you spot issues, run the printer’s cleaning cycle once or twice and print another test page. This ensures your Canon printer produces sharp, vibrant prints every time.
Frequently Asked Questions
How Often Should I Replace Ink Cartridges in My Canon Printer?
You should replace your Canon printer ink cartridges when print quality declines or the printer alerts you about low ink. Frequency depends on your usage, but typically every few months if you print regularly.
If you notice faded prints or streaks, it’s a good sign to change the cartridges. Keeping an eye on ink levels through the printer software can help you plan replacements. Regular maintenance ensures consistent print quality and prevents damage to the printer.
Can I Use Third-Party Ink Cartridges With My Canon Printer?
You can use third-party ink cartridges, but you might face print quality issues, warranty concerns, and potential printer malfunctions.
You’ll save money, but you could risk reliability, so weigh benefits against drawbacks before deciding.
What Should I Do if My Printer Doesn’T Recognize New Cartridges?
If your printer doesn’t recognize new cartridges, try removing and reinstalling them carefully. Clean the cartridge contacts gently, reset the printer, or update its firmware.
If issues persist, consider using genuine Canon cartridges for compatibility.
How Do I Recycle or Dispose of Used Ink Cartridges?
You can’t just toss used ink cartridges into the trash—they’re like tiny treasure chests of chemicals! Instead, recycle them at local drop-off points or return them to Canon’s recycling program to protect the environment and keep things green.
Can I Refill Ink Cartridges Instead of Buying New Ones?
Yes, you can refill ink cartridges instead of buying new ones, but be careful. Refilling can save money but may cause print quality issues or damage your printer.
Always use compatible ink and follow proper refilling steps.
Conclusion
Now that you’ve replaced your Canon printer’s ink cartridges, you’re just one step away from crisp, vibrant prints.
But before you start printing your important documents or favorite photos, the real test awaits—will everything work seamlessly? Don’t rush; perform that test print carefully.
The moment you see those clear, sharp lines appear is when you’ll know all your effort paid off.
Ready to find out if your Canon printer ink change was successful and your printer is back in action?