How to Clean Printer Heads
If your printer’s prints look streaky or colors are missing, your print heads might be clogged. Cleaning printer heads is essential to maintain print quality and prevent damage.
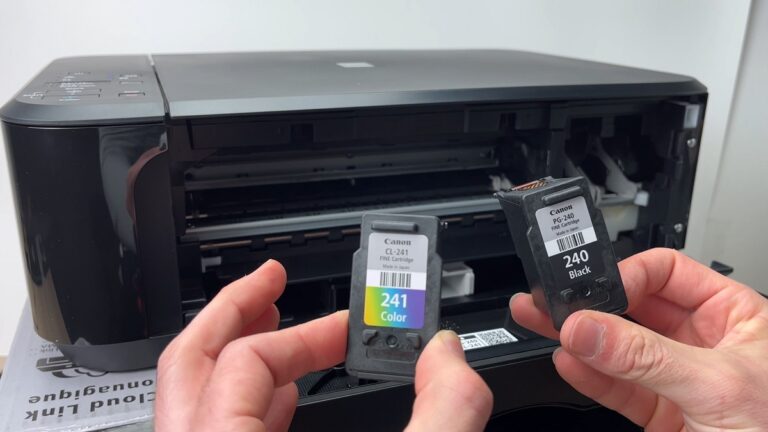
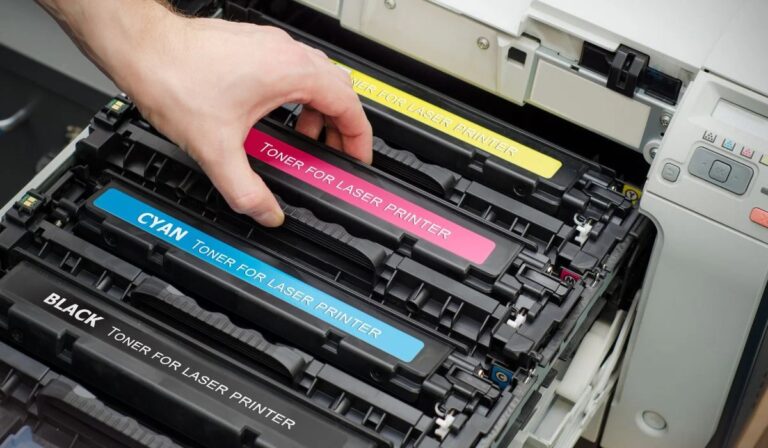
Start by turning off and unplugging your printer, then carefully remove the cartridges.
You can manually clean the heads using a lint-free cloth with distilled water or isopropyl alcohol, letting them dry before reassembling.
Many printers also have a built-in cleaning cycle accessible via software that helps dissolve dried ink.
To keep your printer running smoothly, regular use and proper storage are key.
Exploring these tips more can help you maintain crisp print quality. Regular maintenance ensures your printer lasts longer and produces vibrant prints consistently.
Don’t overlook the importance of cleaning printer heads for optimal performance.
Key Takeaways
- Turn off and unplug the printer, then carefully remove ink cartridges for safe access to the print heads.
- Use distilled water or isopropyl alcohol with a lint-free cloth to gently wipe the print heads without touching electrical contacts.
- Run the printer’s built-in head cleaning cycle via software or control panel to dissolve dried ink and unclog nozzles automatically.
- Repeat manual or software cleaning cycles as needed but avoid excessive cleaning to prevent damage to delicate parts.
- Maintain regular printing, use quality ink, and keep the printer in a clean, dry environment to prevent future clogs.
Understanding Printer Head Clogs

Although printer head clogs can be frustrating, understanding why they happen can help you prevent and fix them more effectively. Printer heads can clog when dried ink blocks the tiny nozzles that spray ink onto the paper. This usually occurs if you don’t use your printer regularly or if low-quality ink is used.
Environmental factors like dust and humidity can also contribute to buildup on the heads. When clogged, your prints may show streaks, missing colors, or blurry lines. Knowing this, you can recognize early signs of clogging and take action before it worsens.
Regular use and quality ink reduce the chance of clogs. Staying informed helps you maintain print quality and avoid costly repairs down the road.
Preparing Your Printer for Cleaning
Before you start cleaning your printer heads, you’ll want to prepare your printer properly to make sure the process goes smoothly. First, turn off your printer and unplug it to avoid any electrical issues or accidental damage.
Prepare your printer by turning it off and unplugging to ensure a safe, smooth cleaning process.
Next, open the printer cover carefully to access the print heads without forcing anything that might break delicate parts. Finally, remove the ink cartridges gently and place them on a protected surface to prevent ink spills.
Here’s a quick checklist to get you ready:
- Power down and unplug your printer for safety.
- Open the printer cover gently to avoid damage.
- Remove ink cartridges carefully and set them aside.
Taking these steps ensures a safe, hassle-free cleaning experience.
Manual Cleaning Techniques for Printer Heads
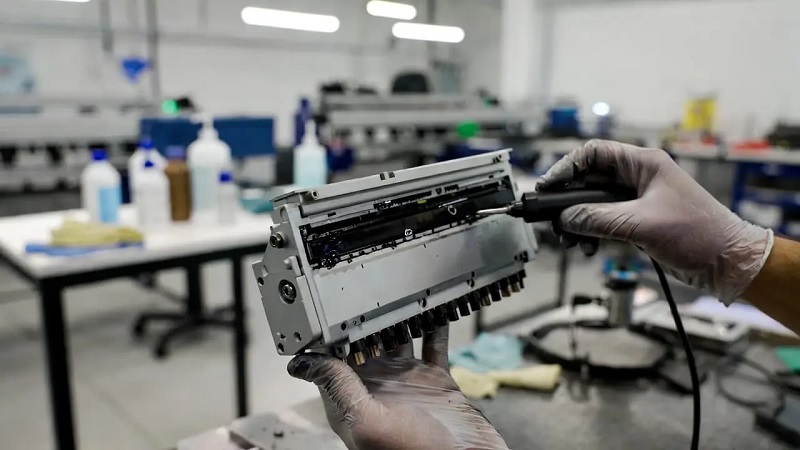
When you notice streaks or faded prints, manually cleaning your printer heads can restore their performance quickly. First, gather distilled water, lint-free cloths, and isopropyl alcohol. Power off your printer and carefully remove the cartridge.
Moisten a cloth with distilled water or alcohol, then gently wipe the print head to remove dried ink. Avoid touching electrical contacts. Let it dry before reinserting the cartridge.
| Step | Tip |
|---|---|
| Remove cartridge | Handle with care |
| Clean head | Use distilled water or alcohol |
| Dry & reassemble | Ensure complete drying |
This hands-on method helps clear clogs and improves print quality without needing software. Repeat if necessary but avoid over-cleaning to prevent damage.
Using Printer Software to Clean Heads
How often have you struggled with streaky prints and wondered if there’s an easier fix than manual cleaning? Luckily, your printer’s software often includes a built-in head cleaning feature that’s quick and effective.
You just need to access the maintenance or tools section on your printer’s control panel or computer software. Running this automated cleaning cycle can help dissolve dried ink and unclog nozzles without any mess.
Here’s why you might want to use software cleaning first:
- It’s effortless and doesn’t require disassembling anything.
- It reduces the risk of damaging delicate printer heads.
- You can perform multiple cycles until print quality improves.
Preventive Tips to Keep Printer Heads Clean
To keep your printer heads in top shape, you’ll want to adopt some simple preventive habits. First, print regularly to prevent ink from drying and clogging the nozzles. Even a quick test page once a week can help.
Use your printer’s recommended ink cartridges to avoid residue buildup from incompatible inks. Keep the printer in a dust-free, dry environment, and close the lid when not in use to minimize exposure. Avoid touching the print head or ink nozzles with your fingers, as oils can cause clogs.
Finally, store unused cartridges properly, ideally in sealed containers. By following these straightforward tips, you’ll reduce the need for frequent cleanings and extend the life of your printer heads.
Frequently Asked Questions
Can Using the Wrong Ink Damage Printer Heads?
Yes, using the wrong ink can damage your printer heads. It might clog or corrode them, leading to poor print quality or even permanent damage.
Always use the recommended ink to avoid these problems.
How Often Should I Replace My Printer Heads?
You might think replacing printer heads is too frequent, but you should swap them every 1-2 years or when print quality drops.
Regular use and ink type affect lifespan, so watch for streaks or fading as signs.
Is It Safe to Use Third-Party Cleaning Solutions?
It’s generally safe to use third-party cleaning solutions if they’re specifically designed for your printer type. However, you should check reviews and manufacturer recommendations because some solutions might void warranties or damage delicate printer components.
Always ensure the cleaning solution is compatible with your printer model to avoid any potential issues.
Can Dried Ink Permanently Damage Printer Heads?
Yes, dried ink can permanently damage printer heads if left untreated for too long. You’ll want to clean them promptly to avoid clogging, which can reduce print quality and sometimes require costly repairs or replacements.
What Signs Indicate a Printer Head Needs Replacement?
Like a fading portrait, blurry prints, streaks, or missing colors show your printer head’s near the end.
If cleaning won’t fix it, you’ll need to replace it before your prints become unreadable ghosts.
Conclusion
Keeping your printer heads clean is like giving your printer a fresh breath of life. By understanding clogs and using both manual and software cleaning methods, you can keep your prints sharp and vibrant. Think of it as tending to a garden—regular care prevents weeds from taking over.
Stick to these simple steps, and your printer will keep humming smoothly, ready to bring your ideas to life without a single smudge or streak. Regular maintenance, including cleaning printer heads, ensures consistent print quality and prolongs the life of your device. Remember, a clean printer head is key to sharp, vibrant prints every time.