How to Configure Printer in Mac
To configure a printer on your Mac, first check its compatibility with your macOS version and connect it via USB or Wi-Fi. Setting up a printer on macOS is straightforward and ensures smooth printing.
Open System Preferences > Printers & Scanners, click the plus (+) button, and select your printer.
If needed, download and install the latest drivers from the manufacturer’s website.
Adjust settings like paper size and print quality for best results. This customization helps you get the most out of your printing tasks.
If you run into issues or want to optimize your setup further, there are simple fixes and tips you can explore next.
Troubleshooting common problems can save time and improve printer performance.
Following these steps will help you enjoy a hassle-free printing experience on your Mac.
Key Takeaways
- Ensure printer compatibility with your macOS version by checking the manufacturer’s website or using AirPrint for easy setup.
- Connect the printer via USB or ensure both Mac and printer are on the same Wi-Fi network for wireless setup.
- Add the printer in System Preferences > Printers & Scanners by clicking the plus (+) button and selecting your printer.
- Download and install the latest compatible drivers from the manufacturer’s website, following installation prompts carefully.
- If issues persist, reset the printing system in Printers & Scanners and re-add the printer to resolve connection errors.
Checking Printer Compatibility With Macos
Before you connect your printer, it’s important to check if it’s compatible with your macOS version. You don’t want to waste time troubleshooting or find out later that your printer won’t work. Start by visiting the manufacturer’s website and look for the macOS compatibility list or driver downloads.
Make sure your macOS version matches the supported versions listed. If your printer is older, check if Apple’s built-in drivers support it; many printers use AirPrint, which works seamlessly without extra drivers. Also, verify if your macOS version has any known issues with specific printer models.
Taking these steps ensures a smooth setup, saving you frustration and making sure your printer functions properly right from the start.
Connecting Your Printer via USB
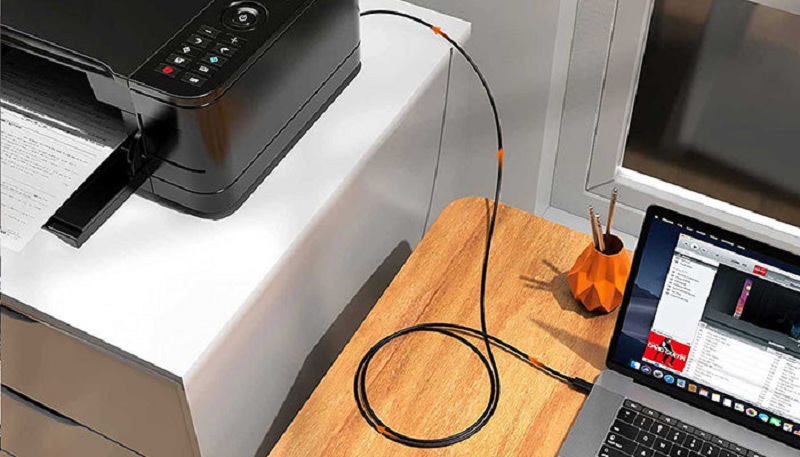
When you’re ready to connect your printer via USB, simply plug the cable into your Mac and the printer. Your Mac should automatically detect the device and prompt you to install any necessary drivers.
If not, you can manually add the printer through System Preferences > Printers & Scanners.
Here’s a quick visualization of the connection process:
| Step | Description |
|---|---|
| 1. Connect Cable | Plug USB cable into Mac and printer |
| 2. Power On Printer | Turn on your printer |
| 3. Detect Device | Mac auto-detects the printer |
| 4. Add Printer | Confirm installation in settings |
Once connected, your printer will be ready to use for all your printing needs.
Setting Up a Wireless Printer on Mac
Wondering how to get your wireless printer up and running on your Mac? First, confirm your printer is powered on and connected to the same Wi-Fi network as your Mac. Most printers have a built-in menu to select and connect to Wi-Fi—follow the on-screen instructions on your printer’s display.
Once connected, your Mac should automatically detect the printer if you’ve enabled Wi-Fi. Keep your printer’s manual handy for specific network setup steps. You might also want to install the latest printer software or drivers from the manufacturer’s website to ensure compatibility and full functionality.
After this, your wireless printer will be ready to use, allowing you to print from any app without needing physical cables. This setup saves space and improves convenience.
Adding a Printer Through System Preferences
After connecting your wireless printer to the same network as your Mac, the next step is to add it through System Preferences. Start by clicking the Apple menu and selecting “System Preferences.” Then, click on “Printers & Scanners.”
You’ll see a list of available printers on the left side. To add your printer, click the “+” button below the list. Your Mac will search for nearby printers; when yours appears, select it.
You can give your printer a custom name if you want, then click “Add.” Your Mac will add the printer to the list, making it ready for use. If it doesn’t show up immediately, try restarting your printer and Mac or checking your network connection.
That’s it—you’re set to print!
Installing Printer Drivers and Software
Before you start printing, you’ll need to download the official drivers from the printer manufacturer’s website. Installing the software applications that come with your printer guarantees full functionality.
Make sure the drivers are compatible with your Mac’s operating system to avoid any issues.
Downloading Official Printer Drivers
Where can you find the official drivers to guarantee your printer works seamlessly with your Mac? The best place is the printer manufacturer’s official website. Head there and look for the “Support” or “Downloads” section.
Enter your printer model to locate the exact driver compatible with your macOS version. Avoid third-party sites, as they might offer outdated or unsafe drivers. Once you find the correct driver, download it directly to your Mac.
This assures compatibility and access to the latest features and bug fixes. Remember, Apple also provides a range of drivers through macOS updates, but visiting the manufacturer’s site is often necessary for newer or specialized printers. This step is vital before moving on to installing the driver software.
Installing Software Applications
Once you’ve downloaded the correct driver, you’ll need to install the software to guarantee your printer communicates properly with your Mac. Double-click the installer package, then follow the on-screen prompts. This process usually involves agreeing to terms, selecting an install location, and entering your admin password.
After installation, restart your Mac if prompted.
Here’s a quick overview of the installation steps:
| Step | Action | Tip |
|---|---|---|
| 1 | Open installer file | Usually a .dmg or .pkg file |
| 2 | Follow install instructions | Accept terms and conditions |
| 3 | Enter admin password | Needed to authorize changes |
| 4 | Restart Mac if required | Ensures software loads properly |
This ensures your printer software runs smoothly with macOS.
Verifying Driver Compatibility
Although installing the driver software is essential, you’ll need to verify that the driver you downloaded is fully compatible with your Mac’s operating system. Start by checking the driver’s version against your macOS version. You can usually find this info on the printer manufacturer’s website or in the driver’s release notes.
If the driver isn’t compatible, you might face installation errors or limited printer functionality. Avoid using outdated or unofficial drivers to prevent security risks and performance issues. If your Mac runs a recent macOS update, double-check that the driver supports it.
When in doubt, look for drivers labeled “macOS compatible” or visit Apple’s support page for recommended printer drivers. This step guarantees smooth printer operation without unexpected glitches.
Configuring Printer Settings for Optimal Performance
To get the best results from your printer, you’ll need to adjust its settings carefully. Start by opening “System Preferences” and selecting “Printers & Scanners.” Choose your printer from the list, then click “Options & Supplies.”
Here, you can customize features like paper type, print quality, and duplex printing. Selecting the right paper setting guarantees colors and details come out sharp, while adjusting print quality balances speed and ink usage. If your printer supports duplex printing, enabling it saves paper.
Also, check for any advanced options specific to your model, such as color management or resolution settings. Making these tweaks helps your printer operate efficiently, reduces waste, and ensures every printout meets your expectations.
Troubleshooting Common Printer Connection Issues
If your Mac isn’t connecting to the printer, start by checking if the printer is compatible with your system.
Next, verify your network settings to make certain both devices are on the same connection.
If problems persist, try resetting the printing system to clear any glitches.
Check Printer Compatibility
How do you know if your printer will work smoothly with your Mac? First, check if your printer supports macOS and the specific version you’re running. Visit the manufacturer’s website for compatibility info and available drivers.
Using incompatible printers can cause errors or limited functionality.
Here’s a quick compatibility checklist:
| Printer Model | macOS Support | Driver Availability |
|---|---|---|
| HP LaserJet Pro | Yes | Built-in & Download |
| Canon Pixma TS | Yes | Download Required |
| Epson EcoTank | Partial | Download Required |
| Brother HL Series | Yes | Built-in |
| Generic USB | Limited | Basic Functionality |
Always confirm your printer’s compatibility before setup to avoid connection headaches.
Verify Network Settings
Where should you start when your printer won’t connect to your Mac? First, verify your network settings. Make sure both your Mac and printer are connected to the same Wi-Fi network.
Check your Mac’s Wi-Fi status in the menu bar and ensure the printer’s display confirms it’s on the correct network. If your printer uses an Ethernet cable, confirm the cable is securely connected to both the printer and router.
Next, open System Preferences > Network on your Mac to see if your internet connection is active and stable. You can also try restarting your router to fix any temporary network issues.
Lastly, guarantee your firewall or security software isn’t blocking the printer’s connection. Verifying these network settings helps resolve most connection problems efficiently.
Reset Printing System
Though verifying your network settings usually solves printer connection issues, sometimes you’ll need to reset the printing system to clear out persistent problems.
Resetting removes all printers, scanners, and faxes from your Mac, along with their settings, giving you a clean slate. To do this, open System Preferences and go to Printers & Scanners.
Right-click or Control-click in the printer list and select “Reset printing system.” Confirm the action when prompted. After the reset, you’ll need to re-add your printer by clicking the plus (+) button and selecting your device from the list.
This process often resolves stubborn errors or connection failures that basic troubleshooting can’t fix, so don’t hesitate to try it if your printer still won’t cooperate.
Managing and Removing Printers on Your Mac
When you no longer need a printer or want to keep your list organized, managing and removing printers on your Mac is straightforward. To start, open System Preferences and select Printers & Scanners. Here, you’ll see all the printers added to your Mac.
To remove one, simply select the printer from the list and click the minus (–) button below. Confirm the removal when prompted. If you want to rename or set a default printer, you can do so by selecting the printer and adjusting settings in the right pane.
Managing your printers helps avoid clutter and ensures you only see devices you actively use. It’s a quick way to keep printing efficient and your setup clean without hassle.
Frequently Asked Questions
Can I Print Directly From My Iphone to a Mac-Configured Printer?
Yes, you can print directly from your iPhone to a Mac-configured printer if both devices support AirPrint or are on the same network.
Just select the printer when you tap the share or print option on your iPhone.
How Do I Share My Mac Printer With Windows Devices?
You can share your Mac printer with Windows devices by enabling printer sharing in System Preferences, then adding the printer to Windows via its IP address or network path.
Make sure both devices are on the same network.
What Macos Version Is Best for Printer Compatibility?
Printer compatibility in macOS Big Sur or later is like a golden key opening countless doors; you’ll find the broadest support and latest drivers, ensuring your printer works smoothly without endless troubleshooting headaches or delays.
Can I Use Third-Party Apps to Manage My Printer on Mac?
Yes, you can use third-party apps to manage your printer on Mac. They often offer extra features beyond macOS’s built-in options, but make sure the app is compatible with your printer model and macOS version.
Using these apps can enhance your printing experience by providing more control and customization. However, always download apps from trusted sources to ensure security.
Check for updates regularly to keep the app functioning smoothly with your Mac system.
How Do I Set up Multiple Printers on One Mac?
You can add multiple printers by going to System Preferences > Printers & Scanners, then clicking the “+” button to add each printer.
You’ll see all added printers listed, and can select which one to use anytime.
Conclusion
Now that your printer is set up, imagine crisp pages flowing smoothly from your Mac, each printout a clear reflection of your work. With compatibility checked and drivers installed, your printing experience should feel seamless, like a well-oiled machine.
If hiccups arise, you’ve got the tools to troubleshoot and manage your devices confidently. Soon, printing will be as easy as a gentle breeze, letting you focus on what truly matters—creating and sharing.
By following these steps to configure printer in Mac, you ensure reliable and efficient printing every time. Embrace the ease of printing on your Mac and enjoy the convenience it brings to your daily tasks.