How to Install Ink Cartridge in Hp Printer
To install an ink cartridge in your HP printer, first turn on the printer and open the access door. Wait for the carriage to stop moving completely. This ensures safe and easy cartridge replacement.
Gently remove the old cartridge by pressing down and pulling it out. Take the new cartridge and peel off the protective tape carefully.
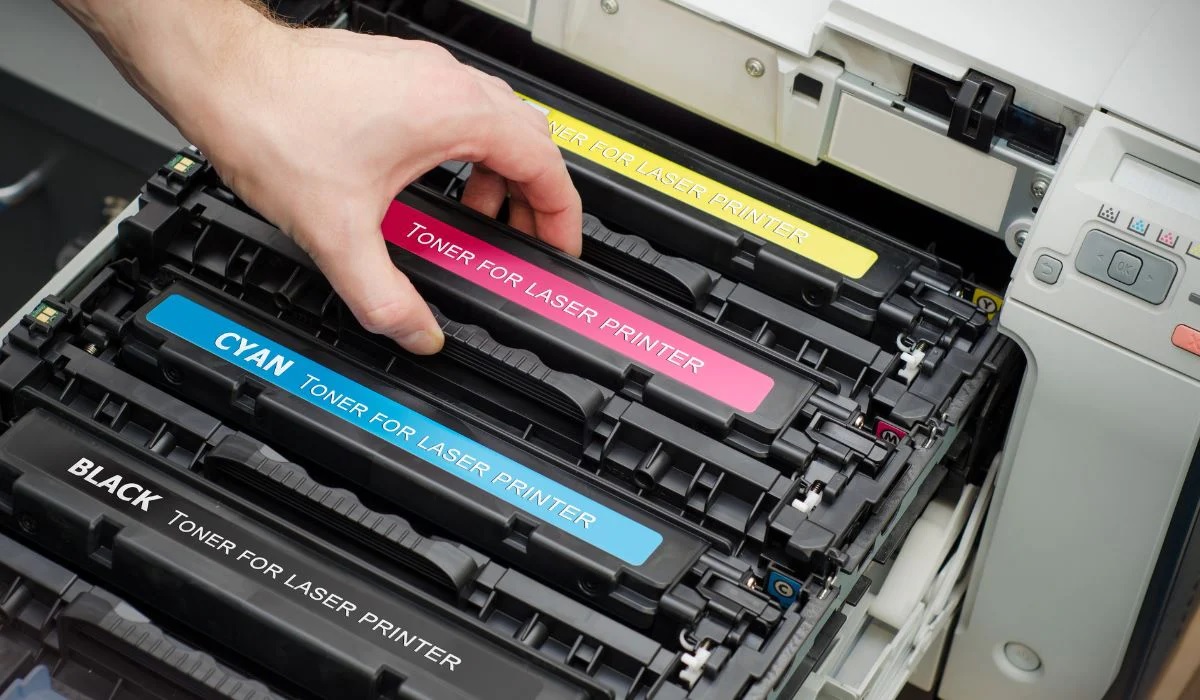
Slide it firmly into its color-coded slot until it clicks into place.
Close the access door securely. Use the printer’s software to align the cartridge for optimal print quality.
For additional tips on troubleshooting and maintenance, continue exploring below.
Key Takeaways
- Turn on the HP printer and open the cartridge access door, waiting for the carriage to stop moving completely.
- Remove the old cartridge by pressing down gently and pulling it out carefully to avoid ink spills.
- Take the new cartridge out of packaging, peel off protective tape, and hold it by the sides without touching contacts or nozzles.
- Insert the new cartridge into the correct slot, press firmly until it clicks, and close the access door gently.
- Run the printer’s alignment process via software or control panel to ensure optimal print quality and color accuracy.
Preparing Your HP Printer for Cartridge Installation
Before you install the ink cartridge, make sure your HP printer is turned on and plugged in. This guarantees the printer’s internal mechanisms are active and ready for cartridge installation. Next, open the printer’s access door carefully; you’ll usually hear a slight movement as the cartridge carriage shifts to the installation position.
Wait for the carriage to stop moving completely before proceeding. Avoid touching any electrical contacts or nozzles inside the printer to prevent damage. Also, have your new ink cartridge ready, removing any protective tape or packaging just before installation.
Keeping the cartridge upright helps prevent ink leakage. By preparing your printer correctly, you’ll make the installation process smoother and reduce the risk of errors or damage during the cartridge replacement.
Removing the Old Ink Cartridge Safely
Once the printer carriage has stopped moving, you can carefully remove the old ink cartridge. First, open the printer cover and gently press down on the cartridge to release it. Pull it out slowly to avoid spilling ink.
Keep a tissue handy to catch any drips.
Here’s a quick guide:
| Step | Action | Tip |
|---|---|---|
| 1 | Open printer cover | Use both hands to avoid damage |
| 2 | Press down cartridge | Apply gentle pressure |
| 3 | Pull cartridge out | Pull straight out |
| 4 | Place on tissue or paper | Prevent ink stains |
Unpacking and Handling the New Ink Cartridge
Although unpacking the new ink cartridge might seem straightforward, handling it carefully is vital to avoid damage or ink leaks. First, remove the cartridge from its packaging gently, avoiding squeezing or dropping it. Be sure to hold the cartridge by its sides, not the copper contacts or ink nozzles, as touching these areas can cause malfunctions or poor print quality.
Next, peel off any protective tape or plastic covering the ink nozzles and contacts. Don’t remove any other labels or seals that aren’t meant to come off. Keep the cartridge upright to prevent ink spills, and avoid exposing it to direct sunlight or extreme temperatures.
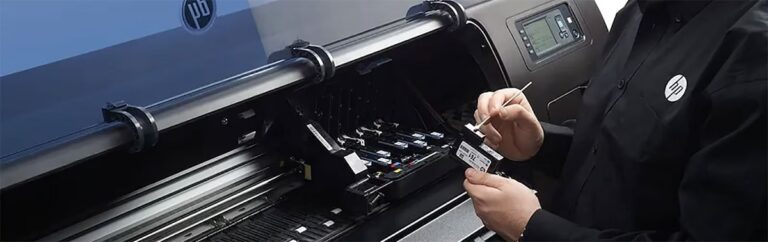
Installing the Ink Cartridge Correctly
Since you’ve prepared the cartridge carefully, you’re ready to install it into your HP printer. First, open the printer’s ink cartridge access door. Gently slide the cartridge into its slot, matching the color label on the cartridge with the label inside the printer.
Press down firmly until it clicks into place. Close the access door.
Here’s a quick checklist to ensure proper installation:
| Step | Action | Tip |
|---|---|---|
| 1 | Open access door | Wait for the carriage to stop |
| 2 | Insert cartridge | Align colors correctly |
| 3 | Press firmly | Listen for the click |
| 4 | Close door | Don’t force the door closed |
Follow these steps carefully for a smooth installation.
Aligning the Ink Cartridge for Optimal Performance
Now that you’ve installed the ink cartridge, it’s important to align it properly to guarantee the best print quality. You’ll want to follow the correct placement techniques and use your printer’s alignment tools.
If you notice any issues, troubleshooting misalignment can save you from wasted ink and poor prints.
Cartridge Alignment Basics
When you install a new ink cartridge, you’ll want to align it to make sure your prints come out sharp and colors stay true. Proper alignment ensures the printhead correctly positions ink droplets on the paper, avoiding blurry text or color misregistration. Most HP printers prompt you to start the alignment process automatically after installing cartridges, but you can also do it manually via the printer’s control panel or software.
Keep these cartridge alignment basics in mind:
- Use the printer’s built-in alignment feature to guide you through the process step-by-step.
- Print the alignment page and follow any on-screen instructions for scanning or adjusting.
- Avoid skipping alignment, as it optimizes print quality and helps prevent ink wastage.
Following these steps keeps your printer running smoothly and your documents looking professional.
Proper Placement Techniques
Although installing the ink cartridge is straightforward, placing it correctly is essential for your printer’s performance. When you insert the cartridge, make sure you hold it by its sides to avoid touching the copper contacts or nozzles. Slide it gently into the cartridge slot at a slight angle, then press firmly until you hear a click, signaling it’s securely in place.
Check that the cartridge sits flush without any gaps or tilting. Avoid forcing it, as this can damage the contacts or the cartridge itself. Once inserted, close the printer cover carefully to prevent dislodging the cartridge.
Proper placement guarantees smooth ink flow and accurate printing, helping your HP printer deliver sharp, consistent results every time.
Troubleshooting Misalignment Issues
Ensuring your ink cartridge is properly placed is just the first step; sometimes, you might still encounter misalignment issues that affect print quality. If your prints look blurry or colors seem off, realigning the cartridge can help.
Here’s what you can do to troubleshoot misalignment:
- Access the printer’s control panel or software on your computer and select the “Align Cartridge” option.
- Follow the on-screen instructions to print an alignment page, then scan or review it as prompted.
- If problems persist, remove the cartridge, clean the contacts gently with a lint-free cloth, and reinstall it securely.
Troubleshooting Common Installation Issues
If your printer doesn’t recognize the cartridge, it’s usually due to improper installation or compatibility issues. You might also notice ink leaks, which can happen if the cartridge is damaged or not seated correctly.
Let’s go over how to identify and fix these common problems.
Cartridge Not Recognized
When your HP printer doesn’t recognize the ink cartridge, it can be frustrating, but there are a few quick checks you can do to resolve the issue. First, make sure the cartridge is properly seated in its slot; sometimes it might not click into place fully.
Next, check the protective tape on the cartridge—if you missed removing it, the printer won’t detect the cartridge. Finally, inspect the gold contacts on the cartridge and inside the printer for dirt or smudges, which can interfere with communication.
- Reinstall the cartridge ensuring a firm, correct fit
- Remove any protective covers or tape completely
- Clean the cartridge contacts gently with a lint-free cloth
Following these steps usually gets your printer back up and running.
Ink Cartridge Leaks
Although ink cartridge leaks can be frustrating, you can usually fix them by identifying the cause quickly. First, check if the cartridge’s protective tape or plastic cover was fully removed before installation—leaving it on causes leaks.
Next, inspect the cartridge for any cracks or damage; a faulty cartridge needs replacing. Make sure the cartridge is seated properly in its slot, as improper placement can lead to ink spills.
Also, avoid shaking the cartridge vigorously before installation, which can cause leaks. If ink spills inside the printer, clean it gently with a lint-free cloth to prevent damage.
Taking these steps helps you resolve leaks efficiently and keeps your HP printer running smoothly without messy interruptions.
Maintaining Your HP Printer After Cartridge Replacement
Since you’ve just replaced the ink cartridge, it’s important to take a few steps to keep your HP printer running smoothly. Proper maintenance helps avoid clogs and extends the life of your printer. Make sure to:
- Run a cleaning cycle through the printer’s software to clear any dried ink and ensure best print quality.
- Keep the printer in a dust-free environment and cover it when not in use to prevent debris from affecting internal components.
- Print regularly, even if it’s just a test page, to keep the ink flowing and prevent cartridges from drying out.
Frequently Asked Questions
How Do I Recycle Used HP Ink Cartridges?
You can recycle used HP ink cartridges by returning them through HP’s free recycling program online or dropping them off at participating stores.
Just pack the cartridge securely and follow HP’s instructions for shipping or drop-off.
Can I Use Third-Party Ink Cartridges With My HP Printer?
Imagine Sarah saved money using third-party ink in her HP printer, but sometimes faced quality issues. You can use third-party cartridges, but your printer might not recognize them or warranty could be affected, so choose carefully.
What Should I Do if My Printer Doesn’T Recognize the New Cartridge?
If your printer doesn’t recognize the new cartridge, try removing and reinstalling it, cleaning the contacts, updating your printer’s firmware, or resetting the printer.
If it still fails, consider replacing the cartridge or contacting support.
How Often Should I Replace Ink Cartridges in My HP Printer?
You don’t have to replace ink cartridges every day—unless you’re printing your novel nonstop. Usually, replace them when print quality fades or your printer warns you.
Don’t wait till pages look like abstract art!
Are There Any Apps to Help Monitor HP Ink Levels?
Yes, you can use the HP Smart app to monitor your ink levels easily. It lets you check cartridge status, order replacements, and manage your printer right from your phone or tablet.
Conclusion
Now that you know how to install your HP ink cartridge correctly, you’re set to keep your printer running smoothly.
Did you know that replacing cartridges promptly can improve print quality by up to 30%?
Taking a few extra minutes to install and align your cartridge properly not only saves ink but also extends your printer’s life.
Proper installation of ink cartridges in HP printers ensures optimal performance and prevents common issues like ink smudges or cartridge errors.
So, keep these tips in mind when you install ink cartridges in HP printers, and enjoy crisp, clear prints every time you print!