How to Replace Toner in Brother Printer
When your Brother printer shows faded prints or a “Replace Toner” alert, it’s time to change the toner in your Brother printer. Proper toner replacement ensures consistent print quality and prolongs the life of your device.
First, power off and unplug the printer, then open the front cover to remove the old cartridge carefully.
Unpack the new toner, shake it gently, and slide it in firmly until it clicks. Close the cover and power on the printer to test print quality.
Want to keep your printer running smoothly and extend toner life?
You’ll find helpful tips ahead.
Key Takeaways
- Turn off and unplug your Brother printer, then open the front or top cover to access the toner cartridge.
- Carefully remove the old toner cartridge by pulling it straight out using the handle.
- Unpack the new toner cartridge, remove protective seals, and gently shake it side to side to distribute toner evenly.
- Insert the new cartridge firmly into the printer’s tracks until it clicks into place, then close the cover securely.
- Power on the printer, print a test page to ensure proper installation, and check for clear, streak-free print quality.
Identifying When to Replace the Toner
Although your Brother printer may keep working for a while after the toner runs low, you’ll notice signs like faded prints, streaks, or error messages indicating it’s time to replace the toner cartridge. You might see uneven printing or lighter areas on your documents, signaling the toner is nearly empty.
Your printer may also display alerts such as “Replace Toner” or “Toner Low” on its screen. If you experience frequent paper jams or smudges, these could also be related to toner issues.
Paying attention to these signs helps you avoid poor print quality and potential damage. By recognizing these indicators early, you ensure your prints remain sharp and professional without wasting time troubleshooting unrelated problems.
Preparing Your Brother Printer for Toner Replacement
Before you replace the toner in your Brother printer, make sure the device is turned off and unplugged to avoid any electrical issues. This step guarantees your safety and prevents damage to the printer. Next, allow the printer to cool down if it’s been recently used, as some parts might be hot.
Gather necessary supplies like a clean cloth or gloves to keep your hands and workspace clean. Clear the area around the printer to have enough room for handling the toner cartridge. Also, check your printer model’s manual or the toner packaging for any specific instructions or warnings.
Taking these precautions will make the replacement process smoother and help maintain your printer’s performance.
Removing the Old Toner Cartridge
Now that your printer is ready, you’ll need to open the printer cover carefully. Once opened, you can grasp the old toner cartridge and pull it out smoothly.
Make sure to handle it gently to avoid any toner spills.
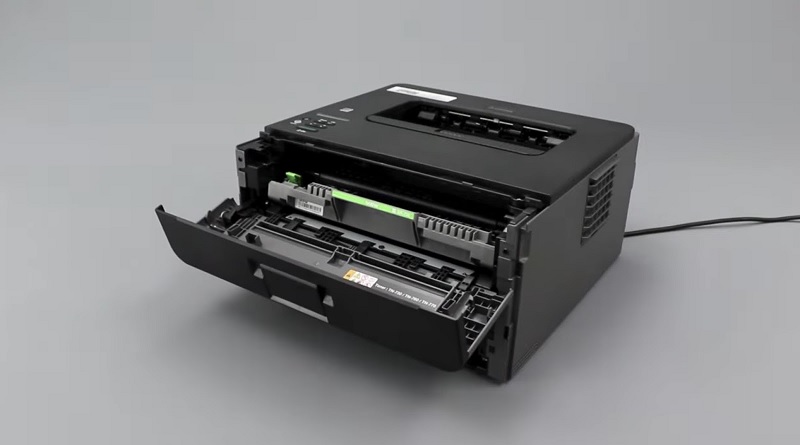
Opening the Printer Cover
Wondering how to access the inside of your Brother printer to replace the toner cartridge? First, make sure the printer is turned off and unplugged for safety. Locate the front cover, usually a large panel on the printer’s front or top.
Gently pull the cover towards you; it should swing open smoothly, revealing the toner cartridge compartment. If the cover feels stuck, avoid forcing it to prevent damage—check for any locking tabs or levers that might need pressing or sliding. Once open, you’ll see the toner cartridge ready for removal.
Keep the cover open while you prepare to take out the old cartridge, ensuring you have clear access without rushing. This simple step opens the path to effectively replacing your toner.
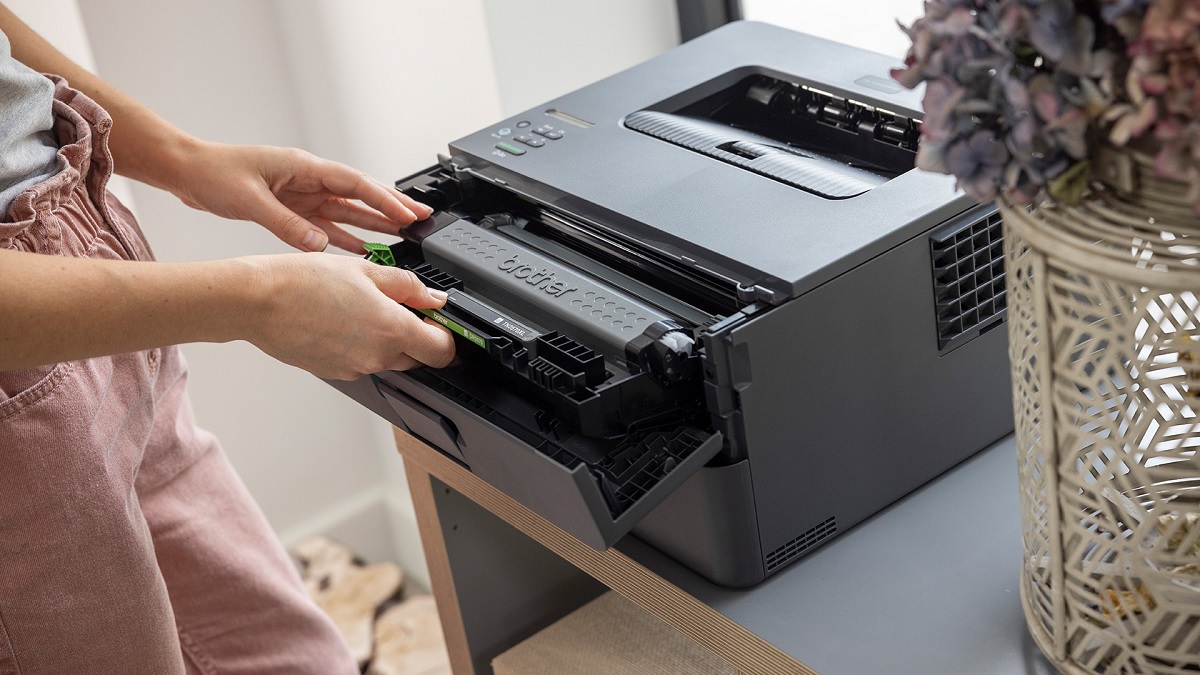
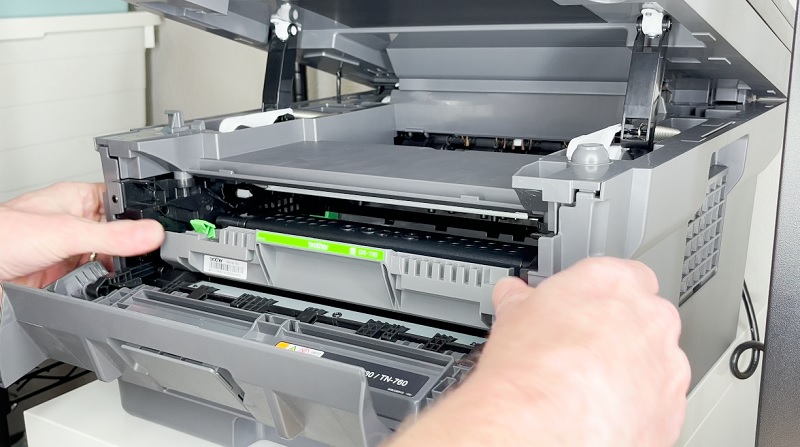
Extracting the Used Cartridge
With the printer cover open and the toner cartridge compartment exposed, you’re ready to remove the old toner cartridge. Grasp the handle on the cartridge firmly, then pull it straight out toward you. Be careful not to tilt or shake the cartridge to avoid spilling toner.
If the cartridge feels stuck, gently wiggle it side to side while pulling. Once removed, place the used cartridge on a disposable surface or inside the packaging of the new cartridge to prevent mess. Avoid touching the drum surface if visible, as oils from your hands can damage it.
After removing the cartridge, double-check the compartment for any leftover toner or debris before proceeding to install the new toner cartridge.
Installing the New Toner Cartridge
Now that you’ve removed the old cartridge, it’s time to prepare the new toner for installation. You’ll want to insert it carefully into the printer, making sure it’s properly aligned.
Once it’s secured, run a quick test print to confirm everything’s working smoothly.
Preparing the Cartridge
Before you install the new toner cartridge, make sure you’ve removed all protective covers and seals. These are usually plastic strips or tapes designed to prevent toner leakage during shipping. Carefully pull any tabs or peel away the plastic to avoid damaging the cartridge.
Next, gently shake the cartridge side to side a few times to evenly distribute the toner inside. This helps ensure consistent print quality from the start. Avoid touching the drum surface or any exposed parts to prevent smudges or damage.
If your cartridge has a protective cap on the drum, remove it now. Once the cartridge is prepped, keep it on a clean, flat surface ready for installation. Taking these steps guarantees your new toner performs at its best.
Inserting the Toner
After you’ve prepared the cartridge by removing all protective seals and shaking it gently, you’re ready to insert it into your Brother printer. Follow these steps to install the toner cartridge correctly:
- Align the cartridge with the tracks inside the printer’s toner compartment. Make sure the cartridge is facing the right direction to avoid damage.
- Slide the cartridge in slowly and firmly until it clicks into place. The click confirms it’s seated properly.
- Close the toner compartment door securely to guarantee the printer recognizes the new cartridge and prevents dust from entering.
Securing and Testing
Once you’ve securely inserted the toner cartridge, make sure to close the printer’s cover completely so it can detect the new cartridge and prevent any errors. Power on the printer if it was off, and give it a moment to recognize the replacement.
Next, print a test page from your printer’s control panel or computer to confirm the toner is installed correctly and functioning well. Check the print quality for any streaks or faded areas. If the printout looks good, you’re all set.
If not, double-check the cartridge’s placement or gently shake it to distribute the toner evenly before trying again. Properly securing and testing ensures your Brother printer runs smoothly without interruptions or error messages.
Resetting the Toner Counter
Although replacing the toner cartridge solves print quality issues, you’ll need to reset the toner counter to guarantee your Brother printer accurately tracks toner usage. Resetting prevents false alerts about toner levels and helps your printer maintain ideal performance.
Here’s how you can do it:
- Open the printer’s front cover and press the “OK” button to access the menu.
- Use the arrow keys to navigate to “Toner Reset” or “Replace Toner” option, then select it.
- Confirm the reset by pressing “OK” again; the printer will reset the toner counter and close the toner cover.
Tips for Maintaining Toner and Printer Performance
To keep your Brother printer running smoothly and extend the life of your toner cartridge, you’ll want to follow some simple maintenance tips. First, always use genuine Brother toner cartridges to guarantee optimal performance and avoid damage. Keep the printer clean by regularly wiping dust and toner residue from the exterior and interior parts, especially around the drum and rollers.
Avoid exposing the toner cartridge to direct sunlight or high temperatures, as this can degrade the toner powder. When printing, try to use the printer frequently to prevent toner clumping or drying out. Finally, update your printer’s firmware regularly to maintain compatibility and efficiency.
Frequently Asked Questions
Can I Use Third-Party Toner Cartridges in My Brother Printer?
Yes, you can use third-party toner cartridges in your Brother printer, but be aware they might influence print quality or void your warranty.
It’s best to choose reputable brands to avoid potential issues and guarantee reliable performance.
How Do I Recycle Used Toner Cartridges Properly?
You can recycle used toner cartridges by returning them to Brother’s official recycling program or local office supply stores. Many manufacturers offer free shipping labels, so don’t toss them—recycle to help the environment and reduce waste.
What Should I Do if the Printer Shows a Toner Error After Replacement?
If your printer flashes a toner error, don’t panic like you’re facing a locked door. Double-check the cartridge’s seating, clean contacts gently, and restart the printer.
Sometimes, it just needs a little nudge to cooperate.
Are Toner Cartridges Compatible Across Different Brother Printer Models?
No, toner cartridges usually aren’t compatible across different Brother printer models. You’ll need to check your printer’s specific model number and use the toner cartridge designed for it to avoid errors or poor print quality.
Using the wrong cartridge can lead to printing issues and may even damage your printer. Always refer to your printer’s manual or the manufacturer’s website for compatible cartridges. This ensures optimal performance and longevity of your device.
How Long Does a Typical Toner Cartridge Last Under Normal Use?
You might be surprised, but a typical toner cartridge usually lasts around 1,200 to 2,500 pages under normal use. How long it truly lasts depends on your printing habits and the type of documents you print.
For instance, printing mostly text documents tends to use less toner than printing images or graphics. Additionally, some cartridges are designed for higher yield, lasting even longer.
Conclusion
So, you’ve mastered replacing your Brother printer’s toner—who knew it wasn’t rocket science? Now that you can swap cartridges like a pro, maybe you’ll even enjoy those “toner low” warnings—they’re just reminders you’re living on the edge.
Keep your printer happy with timely replacements and a little care, and it might just stop acting like it’s auditioning for a drama. Easy, right? Who said printing can’t be thrilling?
With these simple steps to replace toner in Brother printer, you’ll ensure smooth printing and avoid frustrating interruptions. Regular maintenance and timely toner replacement keep your Brother printer running efficiently every time.